
When you use the same ladle dozens of times during long shifts, you start to realize the smallest detail matters. The topic of ladle care kitchen routines pops up among line cooks and chefs eager to keep their tools in the best shape.
Hard use, constant washing, impact, and high heat will quickly wear down even sturdy ladles. Kitchen professionals rely on these tools, making careful maintenance not just smart, but truly essential for daily efficiency and food safety.
If you’d like dependable, ready-to-serve ladles shift after shift, this guide breaks down everything: cleaning routines, storage tips, handling, and what not to do. Let’s dig into actionable ladle care kitchen practices now.
Daily Cleanliness Routines That Set You Up for Success
Establishing a cleaning system pays off immediately with spotless ladles, less build-up, and zero lingering odors. Use the following routines as a foundational habit for long-term ladle care kitchen excellence.
I start each day with a spot check. If a ladle feels sticky or smells, it goes straight to the sink for a hot water soak and brush scrub. Repeat every meal changeover.
Removing Food Residues Before They Set
At the end of each prep session, I rinse the ladle under running water, using fingers to clear any stuck-on puree or sauce before it hardens.
A flexible silicone brush reaches into curves where soup or stew tends to cling. After brushing, rinse again under hot water for at least ten seconds.
This habit prevents residue calcification, which can otherwise stain the bowl and harbor bacteria. Try adding a five-second brush at every break.
Deep Cleaning With Approved Solutions
Some cooks prefer just dish soap, but a diluted vinegar rinse once a week breaks down buildup. I pour a quarter cup of white vinegar into a bowl of hot water, then soak the ladle for ten minutes.
After soaking, use a soft sponge to wipe every surface, including the handle. Avoid any abrasive scrubbers—they scratch the finish and trap grime over time.
Baking soda can tackle persistent stains. Sprinkle it lightly on the ladle and scrub gently, then rinse thoroughly. Only rinse when water runs clear and there’s no residue left.
| Cleaning Method | Frequency | Tools Needed | Key Benefit & Takeaway |
|---|---|---|---|
| Hot Water Rinse | After each use | Running water, hands | Quickly removes residue, prevents crusting—always rinse immediately |
| Dish Soap Scrub | Daily | Soft sponge, mild soap | Cleans grease and particles, keeps surface safe—use gentle pressure |
| Vinegar Soak | Weekly | White vinegar, bowl | Disinfects, tackles build-up—soak for at least ten minutes |
| Baking Soda Spot Scrub | As needed | Baking soda, soft brush | Lifts stubborn stains—gentle scrubbing prevents scratches |
| Dry Cloth Buff | After cleaning | Lint-free cloth | Prevents water spots, ensures fast drying—wipe thoroughly |
Preventing Ladle Damage During Shifts
Avoiding warped, chipped, or loose-handled ladles comes down to daily habits. Consistent application of a few rules means a longer-lasting tool and safer food handling every shift.
The biggest mistakes—letting a ladle sit in boiling soup, rough stacking, or using it to scrape a pot—seem small but add up quickly to costly damage.
Avoiding Heat Stress
Never rest a plastic or wooden ladle in hot pots beyond a few minutes. Prolonged exposure weakens the material and can leach unwanted flavors into food.
- Remove ladle from direct heat when pausing service; heat warps and splits handles.
- Set up a utensil rest near your stove for quick placing between tasks; this prevents accidental burns and softening.
- Rotate metal and non-metal ladles between hot and cool pots; this keeps handles from getting too hot to grip.
- If a plastic ladle smells or its color fades, retire it; lingering heat damage compromises its safety.
- Check handles for soft spots weekly; if the handle flexes or feels tacky, it may not be heat safe anymore.
Heat is a silent enemy for any kitchen tool. Quick actions now sidestep costly replacements down the road.
Stacking and Storage Habits for Durability
Improper stacking bends handles and nicks the serving bowl. Single-layer storage or hook hanging prevents these issues for any busy kitchen setup.
- Hang ladles on a rack or bar—this prevents accidental bending and makes each tool accessible without shifting others.
- Keep each type of ladle separate; avoid mixed bins to reduce impact scratching between metal and plastic.
- For caddies or drawers, insert a soft liner to cushion movement and reduce clatter damage.
- Organize by size and shape; small ladles in the front, larger models behind, to minimize handling mistakes when moving quickly.
- Spot-check for dents or loose rivets at the end of each shift. Replace or repair right away to avoid accident risk.
Ladle care kitchen routines extend the life of your equipment and save budget—organization alone makes a noticeable difference within one week.
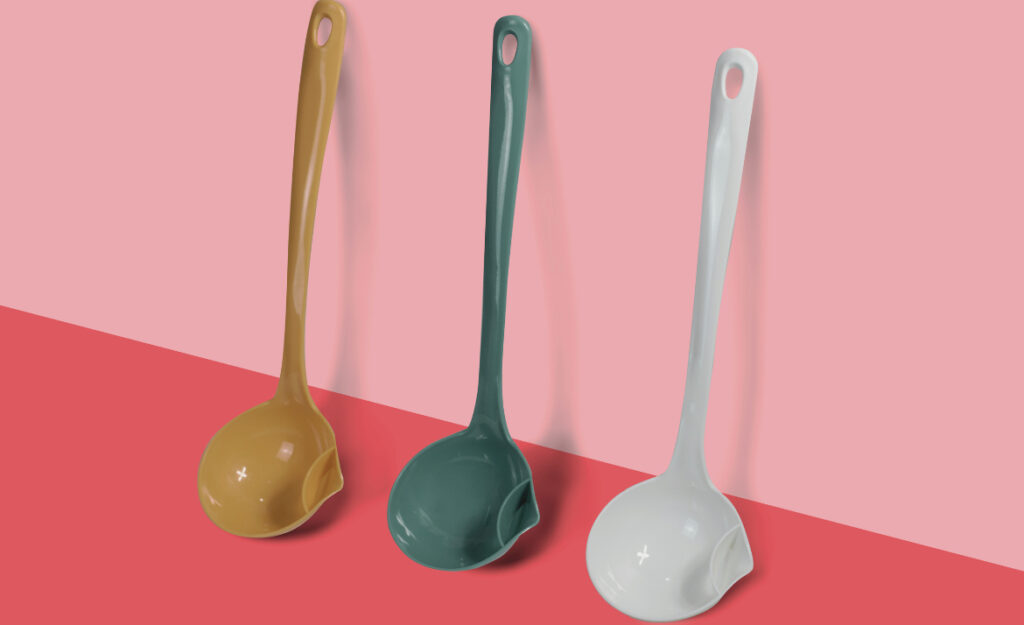
Choosing the Right Ladle for Heavy Kitchen Use
Matching your daily workload with the right type ensures comfort and performance. A mismatched ladle gets worn out faster and makes repetitive strain worse on your hands.
Balancing Material Strength and Food Safety
Professional kitchens move fast, so I always opt for stainless steel first. These ladles resist denting and handle both heat and acidic foods without flavor transfer.
Plastic ladles work well in nonstick pans but watch out for budget brands—thin plastic flexes and then warps with only a few uses in hot liquids.
Wooden ladles provide a traditional touch for broths or rustic service, but they need extra attention for drying and inspection. In the ladle care kitchen routine, check for splits before every use.
Selecting Size and Shape Based on Use
For bulk batch soups, I grab an 8-ounce steel ladle to fill bowls in two motions. It’s quick, controlled, and reduces accidental spills in the pass.
For sauce, gravy, or plating, I keep a set ranging from 2- to 4-ounce bowls. A deep bowl shape grabs thicker mixtures, while a shallow one glides through liquid easily on the line.
Round-handled ladles spin in the grip but won’t dig into your palm during long holding periods. Flat handles help with tight spaces—try both and notice which causes less hand fatigue at your station.
Real-World Ladle Handling Scripts for the Line
Clear scripts help any kitchen run smoother at the busiest pace. Copy these steps for reliable ladle care kitchen handling that reduces breakage and keeps up with service demands.
I show new cooks how to transfer a hot ladle: “Grip with a cloth at the neck, set in the utensil caddy, check for residue, and rinse if sticky.” Always check for cracks or loose parts as you work.
Mid-Shift Quick-Clean Routine
When the soup turns over, I set the ladle in a separate rinse tub, never left in the pot. A 10-second rinse is enough for immediate reuse.
Use two ladles during dinner rush. Rotate them: one cleans while the other serves. Always dry with a paper towel before putting back—water spots cause rust, even mid-shift.
If any residue stays after the hot rinse, set aside for deep cleaning at shift end. Don’t risk cross-contaminating the next pot. Make this a group routine so everyone’s tool is ready.
Hand-Off Etiquette in Kitchen Teams
Before passing the ladle to the next station, show both sides: a quick visual check for food debris helps prevent issues later. It’s a quick gesture of respect.
Saying “Clean,” “Hot,” or “Needs wash” as you hand over a ladle eliminates confusion. New hires can copy this language their very first day in the kitchen.
Avoid sudden tosses or drops—even a soft poly handle can crack on a steel surface. Handing tools directly reduces surprise breakage and builds trust among kitchen staff.
Growing Kitchen Confidence Through Smart Ladle Care
Consistent routines are the backbone of durable tools. When you focus on the right ladle care kitchen habits, you build efficiency, safety, and pride in every bowl you serve—no matter how busy the day gets.
Ladles might seem simple, but their constant action in kitchen workflows makes proper cleaning, storage, and handling crucial for long-term performance. The smallest improvements yield smoother shifts and less tool turnover.
Adopt these practices and watch your team’s confidence grow. Ladle care kitchen strategies transform daily hustle into reliable service, one clean, ready-to-use scoop at a time.
Frequently Asked Questions
What’s the fastest way to clean ladles mid-service?
Rinse under hot running water to remove food, then use a paper towel or clean cloth to dry before returning it to the service area. Regular quick cleans keep tools safe and prevent residue build-up during busy times.
Can I put all ladles in the dishwasher?
Most stainless steel ladles are dishwasher safe, but avoid putting wooden or certain plastics through the machine, as heat and detergent can cause cracks and warping. Always hand wash specialty ladles to extend their lifespan.
What’s the best storage solution for a shared kitchen?
Install a hanging rack above the prep area so staff can access ladles without stacking or hidden damage. Separate metal from plastic ladles to prevent scratching and prolong tool life. Daily spot checks promote consistent organization.
How do I know if a ladle is past its prime?
If you notice a loose handle, persistent odor, chipped surface, or faded color, it’s time to replace. Damaged ladles may be unsafe and can affect food quality. Checking tools before every shift ensures only the best make it to the line.
What’s a quick routine before closing up for the night?
Soak all used ladles in hot soapy water for 10 minutes, scrub with a soft brush, rinse, then dry fully. Hang or lay flat to avoid residual water pools. This prevents bacteria and keeps every ladle ready for morning use.