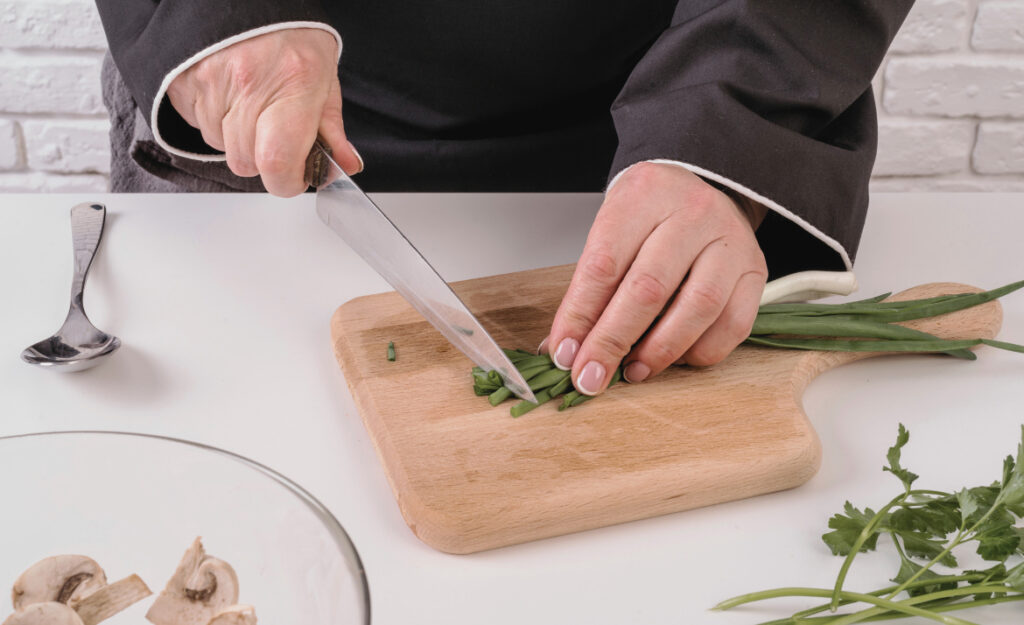
Slicing ingredients with precision isn’t just reserved for professional chefs. Anyone can upgrade their cooking with consistent knife sharpening tips woven into ordinary kitchen routines. When a knife slides easily through a tomato, there’s a clear sense of satisfaction and improved safety in every slice.
Sharpening kitchen knives matters far beyond looks or kitchen bragging rights. Dull blades slip on food, forcing more pressure and causing accidental nicks or sloppy results. The right knife sharpening tips keep kitchen prep reliable and stress-free, making daily meals more enjoyable and efficient.
This guide is packed with practical knife sharpening tips, realistic scenarios, and step-by-step improvements. You’ll learn what makes a blade effective, troubleshoot sharpening mistakes, and set up routines that keep every knife in your drawer performing its best.
Choose the Right Sharpening Tool for Your Kitchen Needs
Using the right sharpening system delivers immediate gains in control and accuracy. The best knife sharpening tips begin with choosing a tool that matches your knives and your comfort level in the kitchen.
A whetstone offers ultimate control. Pull-through sharpeners provide speed and simplicity. Honing rods maintain edges mid-prep. Matching the tool to your needs is the first upgrade anyone should make.
Why Whetstones Stand Out for Precision Enthusiasts
Picture the rhythmic back-and-forth gliding of a chef’s knife across a whetstone. Precision increases because your hands determine every stroke, angle, and finish. Many home cooks prefer whetstones for the tactile feedback. The sharpening process delivers a sense of craftsmanship and accomplishment alongside razor-sharp results.
Consistency matters most with whetstones, and it’s easiest to control pressure and blade angle compared to automated options. Beginners might look up “how to use a whetstone for knife sharpening tips” and find plenty of detailed support online and in kitchen shops alike.
The main tradeoff is time: whetstones take a few extra minutes per session, but those minutes yield the finest edge and better long-term control over your knife collection. If you value craftsmanship, a whetstone pays off.
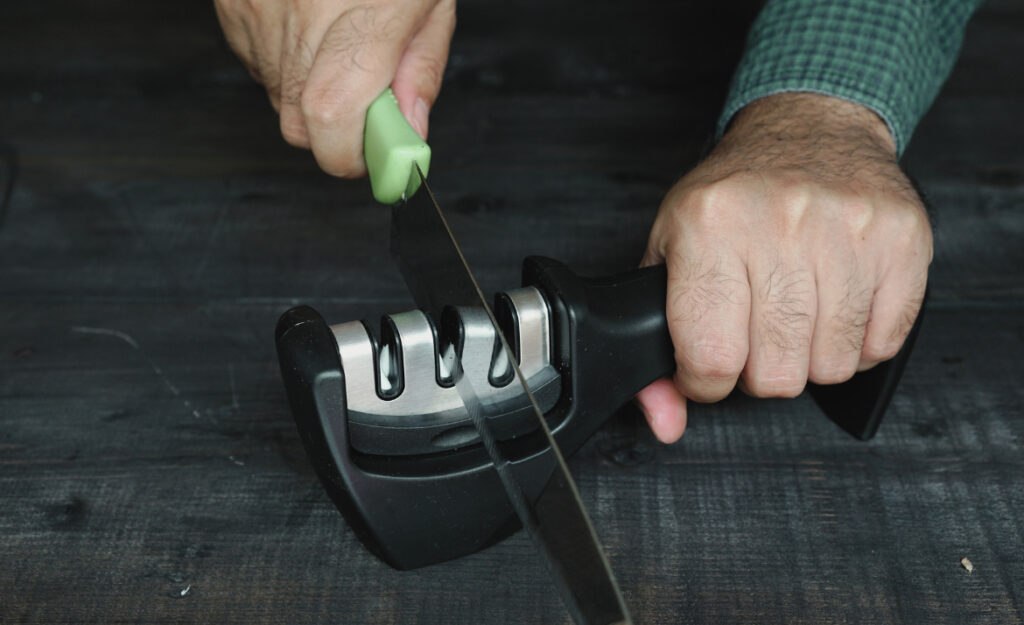
Choosing Pull-Through Sharpeners for Everyday Convenience
If you value speed and simplicity, pull-through sharpeners shine. These tools sit securely on your counter as you draw the blade through preset angles. There’s no guesswork about blade tilt, making beginner mistakes less likely. Most home cooks seeking quick knife sharpening tips love this format.
While they can’t match the ultimate edge polish of a whetstone, they keep knife edges functional and much safer than leaving blades dull. Remember, use gentle pressure and follow manufacturer instructions to avoid eating away blade material too quickly. A few smooth pulls every other week preserve a reliable cutting performance.
Many home cooks quote: “I just want it to work without fuss.” This tool answers perfectly. Just keep in mind, don’t over-sharpen or you’ll reduce your blade’s lifespan.
| Sharpening Tool | Best For | Time Required | Next Step |
|---|---|---|---|
| Whetstone | Precision and fine edge | 10–20 minutes | Practice angle holding |
| Pull-Through Sharpener | Quick touch-ups | 2–5 minutes | Follow light pressure |
| Honing Rod (Steel) | Edge alignment | 1–2 minutes | Use after each prep |
| Electric Sharpener | Multiple knives, speed | 3–7 minutes | Check blade every cycle |
| Professional Sharpener | One-time reset | Varies | Use periodically |
Establish Safe and Effective Sharpening Habits at Home
Building good sharpening habits keeps your prep space organized and your knives lasting longer. Knife sharpening tips are most effective when part of a consistent kitchen routine.
Visualize your workflow: clear a stable surface to sharpen, check your tools, and wipe residues after each session. Over time, these practical steps boost kitchen safety and precision.
Create a Sharpening Schedule and Track Your Tools
Setting calendar reminders for routine sharpening streamlines maintenance. Mark a monthly or biweekly “knife sharpening day.” After each session, note which knives were sharpened and their perceived sharpness. This helps catch dull blades before they disrupt your prep or cause accidents.
- Choose a recurring date, like the first Saturday, to promote consistency and build the habit.
- Keep a dedicated notebook in your kitchen drawer or use a whiteboard to track each knife’s maintenance.
- Visually inspect knives before each session. Look for chips, burrs, or warping before sharpening. This prevents worsening minor issues.
- Remember to clean blades thoroughly before sharpening. Soap and dry cloth remove stored food particles, which can scratch or wear down the edge during sharpening.
- Finish each session by testing each edge using a folded piece of paper or cutting a ripe tomato—two reliable ways to confirm sharpness and accuracy.
Small rituals like this not only make sharpening easier but also reinforce safer handling and attention to detail throughout meal preparation.
Implement Restorative Care to Slow Blade Wear
Regular oiling and immediate drying keep corrosion in check and prevent micro-pitting on the blade surface. After each sharpening, lightly coat blades with food-safe oil—especially if your knives are carbon steel, which rusts quickly in humid kitchens.
- Store knives dry and upright in a block or magnetic rack, so air circulates and edges remain safe from accidental knocks.
- Use drawer liners if storing knives flat. This prevents them from slipping or colliding with other utensils, which dulls and damages sharp edges.
- Apply a tiny drop of mineral oil and wipe with a paper towel to create a protective barrier. Avoid heavy oils that leave residue.
- Visually check for rust after washing and sharpening. If moisture lingers or spots appear, scrub gently with a baking soda paste before oiling and storing.
- Sharpen only clean, dry blades to keep both the edge and your sharpening equipment in optimal condition for years of use.
With these best practices, your knife sharpening tips become protective rituals that slow blade wear and keep your prep safe.
Consistently Maintain Sharpened Edges Between Sessions
Daily care routines protect your investment in sharp knives and uphold every edge between sharpening. The most effective knife sharpening tips focus not just on the sharpening day but what happens in-between.
Consistent cutting habits, immediate cleaning, and proper blade storage all support sharper, safer results during every meal prep.
Use a Honing Rod Regularly as Part of Routine Prep
Incorporating a honing rod after each use quickly realigns the delicate cutting edge bent by chopping or slicing dense foods. Gently swipe the blade along the rod, maintaining a consistent 15 to 20-degree angle as you go from heel to tip. This habit keeps your knife reliable every day.
After finishing with raw protein or dense root vegetables, run your clean blade along the rod for six to eight passes per side. Your knife will stay sharper longer between full sharpening sessions, making food prep smooth and predictable.
It’s easy to make this a cue: return your knife to the rack only after a quick honing pass. The time commitment is minimal, but the payoff is reduced risk of accidents from dull, misaligned blades.
Test Blade Sharpness with Simple At-Home Checks
Each time you sharpen or hone a knife, test the edge before storing it. The “paper test” is especially revealing: hold a piece of printer paper at its edge, and try slicing through with minimal pressure. Sharp blades glide through smoothly, while dull ones catch, tear, or slip.
Test with a ripe tomato or gently press a finger pad (perpendicular, not sliding) against the edge. A truly sharp knife will feel crisp yet not aggressive. This approach anchors your knife sharpening tips to real-world feedback, not just guesswork or habit.
Regularly testing after cleaning or honing prevents surprises during cooking—meaning you keep your workflow safe, accurate, and comfortable for every prep session.
Avoid Common Sharpening Mistakes That Hinder Performance
Many kitchen accidents or frustrating prep days trace back to repeated sharpening errors. Spotting and correcting these missteps ensures your knife sharpening tips deliver peak results and a longer life for your blades.
Recognize Symptoms of Incorrect Sharpening Technique
If you notice uneven edge bevels, visible burrs, or “waves” along the blade, these signs point to inconsistent pressure or mismatched sharpening angles. Your knife might not slice cleanly through food—or worse, feel unpredictable in your grip.
Taking a video of your sharpening technique (or watching a friend’s) helps you correct obvious angle or pressure changes. Consistently inspect both sides of the blade under a bright light for shiny spots or missed sections. Refining this routine is urgent for any home cook relying on knife sharpening tips every week.
When in doubt, less abrasive strokes and patience win over aggressive, rushed sharpening. Remember, finesse outlasts force for a resilient, reliable kitchen edge.
Manage Over-Sharpening and Its Risks
Sharpening a knife more frequently than necessary wears away blade material faster and shortens the lifespan of even high-quality knives. Anyone looking up knife sharpening tips must heed this: sharpen only when needed, not by habit alone.
Keep a close eye on the blade’s thickness at the edge. If you notice it growing thicker or more wedge-like after multiple sessions, take a break and use a honing rod instead. Sharpen sparingly and check performance between sessions to maximize longevity.
If you sharpen out of routine rather than necessity, jot a quick note after each session with the date and blade condition. Let objective sharpness, not habit, guide your schedule for a collection that remains both sharp and substantial.
Tailor Knife Care For Different Blade Types in Your Collection
Adapting your sharpening process to each blade ensures the highest performance and longevity. Not every knife responds the same to identical knife sharpening tips; knowing what’s in your collection helps you act decisively.
Respect the Needs of Western and Japanese Knives
Western knives, like chef’s and paring knives, typically use a 20-degree edge angle and thicker blades. These respond well to conventional sharpening systems and need a robust approach.
Japanese knives, with thinner, harder steel and 15-degree angles, demand lighter pressure and finer grit stones to avoid chipping or rolling the edge. Honing must be especially gentle to prevent fine, brittle tips from breaking.
Aligning each method to these distinctions protects your investment and sharpens your ability to troubleshoot future performance differences in your kitchen arsenal.
Nurture Specialty Edges and Serrations
Serrated knives require tailored tactics. Use a tapered rod or ceramic honing stick to carefully match the curve of the scallops, preserving the structure while refining the sharp points and valleys.
Don’t run these blades through conventional sharpeners, as the abrasion destroys the subtle geometry. Work slowly, resurfacing only the beveled side and checking frequently for burrs or rough spots.
Specialty knives—cleavers, boning, or utility blades—call for selective sharpening based on use. Observe where dullness appears from your prep and tailor touchups to those areas, extending the intervals between full re-sharpening for maximum blade health.
Enhance Safety and Precision with the Right Sharpening Habits
Integrating advanced knife sharpening tips delivers a noticeable boost in meal prep safety and finesse. Sharp knives let you guide the blade with confidence, reducing the urge to force slices and minimizing slippage.
Steady Hand, Clear Workspace: The Foundation of Safe Sharpening
Lay a damp towel beneath your sharpening stone or tool to anchor it firmly. Clear any clutter from your area, freeing your arms for natural, controlled motions. Approach each stroke with calm focus, keeping fingers away from the edge’s path throughout the process.
If sharpening in a hurry, take a deep breath and slow down. “Sharp in haste, bandaged in regret” is a kitchen maxim worth adopting: deliberate movements pay off in both sharper blades and safer skin.
Try this script: “I set up my sharpening area. Towel, stone, light—nothing else.” This personal ritual primes any cook for attentive, safe maintenance.
Tuning Sharpening Frequency to Cooking Volume
If you prep from-scratch meals every day or entertain regularly, your knives will dull more quickly. Weekly touchups and monthly full sharpening keep performance reliable. For lighter users, twice-a-month touchups or quarterly overhauls often suffice for consistent sharpness.
Whenever prepping a large meal or after slicing acidic foods, inspect knife edges immediately. Acidic ingredients like tomatoes or citrus speed up dulling, while high-volume chopping wears edges faster than expected.
Adjust your sharpening calendar to your cooking rhythm, not just the passage of time, integrating knife sharpening tips that reflect your workflow—not a fixed schedule.
Frequently Asked Questions
- How do I know when my kitchen knife needs sharpening?
When gentle pressure no longer yields clean cuts through tomatoes, onions, or paper, it’s time to sharpen. Dull knives drag or slip, making prep unpredictable and less safe. Building this awareness helps time every sharpening session. - Can I sharpen serrated knives at home without special tools?
Serrated knives require a tapered honing rod or ceramic sharpener matched to the scallops. Never use a standard pull-through sharpener on serrated blades; it destroys their unique edge. For best longevity, address each scallop gently, working slowly and deliberately. - Does sharpening damage my knives over time?
Well-executed sharpening extends the life and performance of your blades. Over-sharpening or rough, rushed technique can grind down useful edge material. Regular, light honing and precise sharpening only as needed preserves your knife investment and maximizes its useful life in your kitchen. - How should I store knives after sharpening to keep them sharp?
After sharpening, always clean and dry knives thoroughly. Store them safely in a block, on a magnetic rack, or in a drawer with blade guards. Avoid tossing sharpened blades loosely with other utensils, as repeated contact dulls the edge or risks accidental cuts. - What’s the best way to maintain knife sharpness day-to-day?
Quick honing after each use, gentle cleaning, and immediate drying prevent subtle dulling and corrosion. Set a calendar reminder for routine sharpening sessions, and use at-home sharpness tests to catch changes early. These habits keep sharpness and safety consistent in busy kitchens.