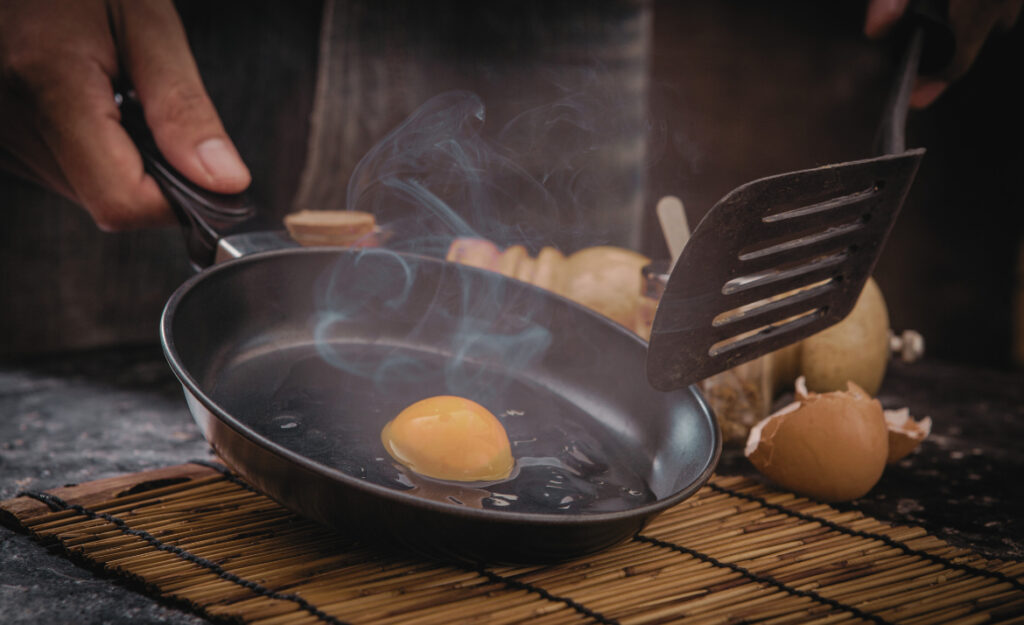
Nothing ruins a great meal faster than worrying your kitchen tools aren’t truly clean. Spotless utensils don’t just feel good—they protect every bite from hidden risks. Finding ways to naturally sanitize cooking tools ensures both peace of mind and a genuinely healthier kitchen experience.
Taking the time to sanitize cooking tools means you’re safeguarding every meal. It’s not about scouring with harsh chemicals, but using simple steps to ensure cleanliness. This shift supports your health and delivers better food flavor, ensuring your utensils last longer and work better.
Want real solutions that are simple, proven, and easy to work into your daily routine? This in-depth guide covers effective, natural ways to sanitize cooking tools—plus handy tips, real-world techniques, and answers to your most pressing utensil-cleaning questions.
Set Up a Daily Cleaning Routine That Actually Stops Germs
Committing to a routine that naturally sanitizes cooking tools means fewer bacteria and fresher flavors. You’ll see less food buildup, reduce cross-contamination, and save time during cleanup. Every effective process starts with this foundation.
Begin by rinsing all your utensils, even if they “look clean.” Use warm water to loosen food bits and grease. This simple step helps natural cleaners work more thoroughly to sanitize cooking tools during the full routine.
Visual Inspection Avoids Missed Spots
Check each cooking tool for hidden food bits and discoloration. Hold spatulas, tongs, or whisks up to a light source—rotate to spot trapped grime. Discard any tool with cracks, as bacteria hide in hard-to-clean crevices. This visual sweep tackles germs before washing ever begins.
Focus on textured areas, like grippy handles and joints, where buildup loves to hide. For example, flex the hinge of your tongs and check for sticky spots you’d otherwise miss. Clearing this helps natural cleaners reach every surface.
After a quick scrub with a gentle brush, rinse again. Pairing this check with your daily routine ensures you truly sanitize cooking tools, not just clean the obvious areas.
Sequence for Soaks and Sprays
For wooden spoons and boards, plan your soak with care. Too long in water promotes cracking. Mix vinegar and water 1:1, soak for two minutes, then dry fast. That cleans without harming the fibers.
For metal or plastic tools, a quick spritz of natural hydrogen peroxide can boost sanitation between deeper cleans. Mist, wait a minute, then rinse thoroughly so surfaces feel residue-free and ready to use.
Rotate your soaks: Monday for metal spatulas, Wednesday for wooden spoons, Friday for whisks. This builds a realistic, maintainable schedule that steadily sanitizes cooking tools week after week.
| Tool Type | Preferred Cleaner | Maximum Soak Time | Quick Takeaway |
|---|---|---|---|
| Wood | Vinegar + Water | 2-3 mins | Fast soak, quick dry prevents cracking & bacteria |
| Plastic | Baking Soda + Hot Water | 10-15 mins | Gentle scrub; rinse thoroughly for no residue |
| Stainless Steel | Lemon Juice or Hydrogen Peroxide | 5-8 mins | Wipe after soak to prevent water spots |
| Silicone | Boiling Water | 5 mins | Great for deep sanitizing; always dry fully |
| Ceramic | White Vinegar | 5 mins | Removes stains & sanitizes safely |
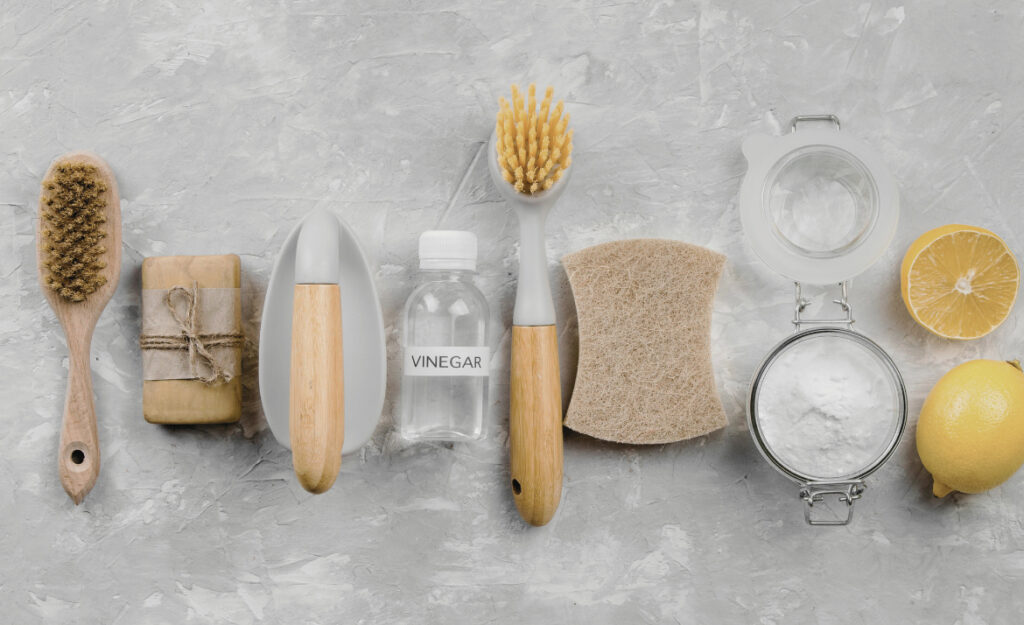
Boost Everyday Cleanliness With Natural Ingredients
Stocking a few key natural ingredients makes it effortless to sanitize cooking tools every day. These simple staples can outperform harsh cleaners while leaving no chemical residue and protecting your tools’ lifespan.
White vinegar tops the list. It kills many foodborne germs, making it a favorite for cooks who care what touches their food. Next, baking soda helps lift residue—its mild abrasiveness tackles grime on utensils without damaging surfaces.
Harness Lemon and Salt for Tough Jobs
Lemon’s acidic juice breaks down surface stains and odors. Squeeze half a lemon over a wooden spoon, sprinkle salt, and scrub. This combo both brightens and helps sanitize cooking tools, especially wooden and ceramic.
- Sprinkle salt on a stained area, rub with lemon halves, then wait 10 minutes before rinsing—acids and abrasives work together to break down residue.
- Always rinse and dry wooden tools quickly after this method. This keeps the grain sealed tight—a cleaner surface that resists bacteria longer.
- Apply the technique to cutting boards after prepping raw meat, using a dedicated lemon and extra salt for a cleaner, safer surface.
- Lemon zest in cleaning water adds a subtle fragrance while supporting stain and germ removal without synthetic scents.
- Mix lemon juice with vinegar for an extra boost when tackling greasy stains on stainless steel utensils.
Lemon and salt offer a simple, appealing way to handle challenging stains and sanitation in your daily routine. The fragrance alone makes cleanup feel less like a chore.
Use Baking Soda Paste For Safe Scrubbing
Combine three parts baking soda with a bit of water until you have a thick paste. Spread it on spatulas or whisks that have tough food residues sticking.
- Let the paste sit for 10 minutes, so the soda has time to dissolve surface grime and neutralize odors.
- Use a dedicated vegetable brush or soft-bristle toothbrush to scrub crevices on textured handles and around rivets—anywhere food bits linger.
- Rinse extremely well under warm running water to ensure no residue remains, which helps keep your sanitized cooking tools ready for immediate use.
- If odors persist, repeat the process, then leave utensils in direct sunlight to dry—the UV exposure complements natural cleaning for extra peace of mind.
- Create a fresh paste each time for best results; never reuse old paste, since bacteria can multiply in leftover mixtures.
This method is gentle enough for plastic, wood, and silicone, so even your most delicate tools come out safe, clean, and fresh.
Remove Lingering Odors For a Truly Clean Kitchen
Utensils shouldn’t carry last night’s aroma into your next meal. Clearing odors means you’ve truly taken steps to sanitize cooking tools and prepare them for future use without unintended flavors.
Use coffee grounds for a quick fix: place your utensils in a shallow tray, sprinkle with used grounds, then let them absorb odors for 30 minutes. Rinse and dry well to finish the job.
Sunlight as a Secret Weapon
Natural sunlight both kills lingering bacteria and lifts mildew smells from wooden spoons, whisks, and boards. Lay items on a clean towel in direct sunlight for one to two hours—flip halfway for even exposure.
This hands-off approach is especially helpful after using natural cleaning agents. When paired with clean water rinses, sunlight forms a final “sanitizer step,” which gives extra reassurance that cooking tools are truly clean.
If odors persist, combine sunlight therapy with another technique—like soaking in vinegar then air-drying outside. Repeat as needed until every tool leaves no trace scent, only cleanliness and readiness.
Use Steam for Deep Cleaning in a Pinch
For especially stubborn smells, bring a pot of water to a rolling boil, then hold the problematic utensil above the steam (with tongs) for several minutes. Moist steam penetrates crevices where odors hide.
This works well for silicone spatulas, mesh strainers, or stainless whisks—just make sure to not over-steam wooden tools, as they’re prone to warping if soaked.
Pairing steam with your ongoing cleaning schedule gives you a powerful backup. You’ll consistently sanitize cooking tools and banish persistent food scents with minimal effort or added cost.
Prevent Cross-Contamination With Storage and Use Habits
Proactive storage and intentional use habits do more than tidy your space. Each step directly supports your effort to sanitize cooking tools, preventing unnecessary spread of bacteria during meal prep.
Use separate utensils for raw and cooked foods. For example, always grab a fresh spatula after flipping raw chicken, then set aside the original tool for later cleaning.
Dedicated Holders Make a Noticeable Impact
A countertop crock or divided drawer insert makes it easy to keep specialized utensils apart. Store vegetable-peeling knives with similar tools, and keep meat-preparation utensils separated in a clear container labeled for quick access.
This habit doesn’t only support kitchen efficiency—it serves as a direct barrier to bacteria wandering from tool to tool. Quick visual checks reinforce the system every time you cook.
Wipe down the outside of storage holders with vinegar solution weekly. Clean storage equals clean utensils, so don’t overlook this final point in the cleanliness pipeline.
Strategic Drying Means Longer Lasting, Cleaner Tools
After washing and rinsing to sanitize cooking tools, drying correctly can make or break your whole effort. Damp corners trap bacteria and destroy wood and metal finishes prematurely.
Skip air-drying piles in dark corners. Instead, stagger utensils upright in an open rack, or lay them separately on a clean cotton towel. This step is as vital as cleaning itself.
Accelerate Drying With Kitchen Towels
Lay each utensil flat on a tightly woven, cotton towel—leave at least an inch of space between items. Carefully blot handles, especially textured grips, so water beads don’t remain hidden.
This prevents mold and mineral buildup. Come back after fifteen minutes to rotate tools, ensuring complete evaporation. For wooden spoons, dry immediately to keep fibers sealed and prevent splitting.
Towel drying takes just seconds but extends the sanitized lifespan of every cooking tool in your kitchen. This quick action can be part of your regular cleanup without extra hassle or expense.
Quick-Reference Tips for a Naturally Clean Kitchen
Keep this checklist on hand to revisit the core ways to consistently sanitize cooking tools using natural ingredients and reliable routines. Small actions compound, yielding a far fresher and safer kitchen environment.
- Always double-check for hidden food bits in joints and textured areas before washing, minimizing bacteria hiding places and ensuring thorough sanitization with every session.
- Use a gentle, food-safe brush for cleaning intricate tools like whisks or strainers, as soft bristles preserve surfaces while reaching deep into crevices where residue collects.
- Label utensils used for raw meats with distinct colored grips or tags to prevent cross-contamination. This small, visual cue supports safe habits every day.
- Add a splash of vinegar to your dishwater before washing: this quick trick boosts overall sanitizing power, especially for items that frequently touch fresh produce or eggs.
- Rotate drying positions after a few minutes. Shifting angles exposes more surface to air and speeds up evaporation, drastically reducing the chance of moisture-borne germs lingering.
Reviewing and acting on these tips makes a sustainable impact on both your daily cleaning routine and long-term kitchen safety. Each habit only takes seconds to implement.
Consistent Habits Bring Fresh, Safe Results Every Meal
The steps to sanitize cooking tools naturally aren’t complex, but they do require consistency and a bit of daily awareness. Small, routine actions rapidly turn into powerful habits protecting your kitchen.
Rinsing, visual checks, ingredient-powered soaks, proper storage, and thoughtful drying together deliver a kitchen where every meal is genuinely clean and flavor shines through. Each part works with the next, simplifying your sanitation process without adding stress.
Paying attention to these habits improves both utensil longevity and your kitchen’s freshness. The real reward is knowing you’ve created a safe, welcoming space for every dish and every guest.
Frequently Asked Questions
How frequently should I sanitize cooking tools for home use?
Sanitize cooking tools at least once a day if you prepare multiple meals or frequently handle raw meats. For lighter use, twice weekly thorough cleaning with natural solutions keeps tools safe and ready for any recipe.
Can I use natural methods for commercial kitchen tools?
Natural sanitation works in commercial kitchens for most utensils, especially wooden, silicone, and stainless tools. Always check local guidelines and pair natural methods with required high-temp dishwashing for maximum compliance and safety.
What’s the safest way to naturally disinfect wooden spoons?
Mix equal parts white vinegar and water. Soak the spoon for just two minutes, rinse and towel dry. This method sanitizes cooking tools, particularly wooden ones, without splitting or damaging the grain.
How do I thoroughly clean whisks without a dishwasher?
Soak whisks in a baking soda and hot water solution for 10 minutes. Scrub crevices with a dedicated toothbrush, rinse, and towel dry. Use this process directly after egg or dough mixing to prevent residue from hardening.
Does lemon juice remove all foodborne bacteria from utensils?
Lemon juice alone can reduce bacteria, especially on wood or ceramic. For full sanitation, combine lemon with salt or vinegar, scrub thoroughly, then rinse and let utensils dry in bright sunlight when possible for added natural disinfecting power.