

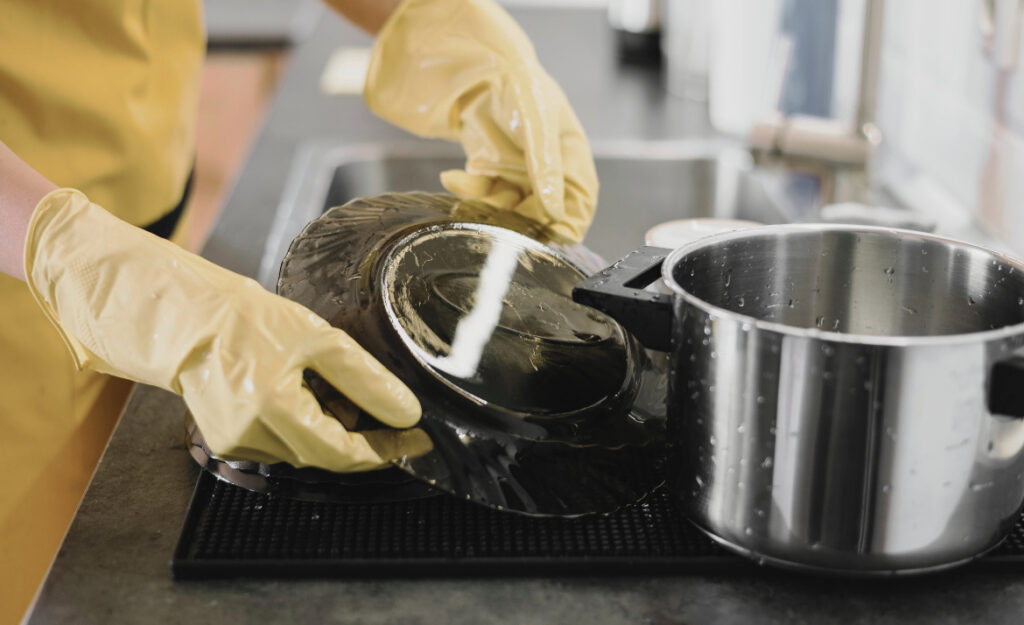
Crusty whisks, greasy spatulas, and knives dotted with streaks—sound familiar? Many of us sigh at the cleaning step after cooking, but utensil cleaning hacks truly make life easier. Professionals rely on these hacks to achieve fast, thorough results at home and in busy kitchens.
Whether you’re preparing family meals or turning out dishes for customers, caring for utensils matters. Clean tools prevent mixing flavors, spreading germs, and ruining the satisfaction of a well-prepped meal. Plus, spotless utensils extend the life of your cooking favorites.
Learning utensil cleaning hacks professionals recommend can streamline cleanup, boost kitchen safety, and leave your tools shining. Let’s dive into evidence-backed techniques and clever ideas that help every kitchen run smoother, from home cook to chef’s station.
Choosing the Right Routine Elevates Any Cleaning Hack
The outcome here: You’ll build a reliable routine so every utensil gets the right attention at the perfect time while using smart utensil cleaning hacks. Mixing daily habits with weekly deep-cleans covers all the bases and prevents buildup.
Instead of letting utensils pile up, professionals wash immediately after use, breaking work into small chunks. This approach keeps stains and grime from becoming a tough, sticky mess. It also avoids germs multiplying between meal preps.
Washing Immediately Stops Problems Before They Compound
Pros wipe and rinse key tools right after use, especially if they’ve touched raw meat or acidic foods. Delaying lets debris dry and stick, which takes extra scrubbing. Instead, make a quick rinse second nature between chopping or stirring steps.
Chefs might say, “Finish prep, then give it a rinse,” as they pass a spatula from hand to sink. A visible sink setup with warm water and mild soap encourages following this routine daily. The habit prevents bacteria from multiplying and cuts down scrubbing time.
This immediate-action mindset feels like cleaning up a coffee spill before it becomes a stain. It’s far easier to wipe, rinse, and repeat than to undo dried-on messes later. The result: tools that look and feel pristine with less effort over time.
Segmenting Weekly and Daily Care Yields Predictable Results
Daily, focus on rinsing and scrubbing everything that’s been used. Weekly, go deeper: boil wooden spoons, sharpen knives, and check crevices in tongs and whisks. Segmented care means nothing gets overlooked, and you won’t risk mixing flavors or cross-contaminating.
Set a recurring time—like every Sunday evening—to handle weekly deep cleaning. Create a checklist: disassemble gadgets, scrub handle joints, sanitize cutting boards, and polish all metal. This system brings the reliability professionals need during service but works just as well at home.
Compare it to dental hygiene: twice a day brushing, plus flossing and dentist visits, beats last-minute scrubbing. Combining frequent quick washes with periodic deep-cleaning delivers the spotless finish professional kitchens prize.
| Tool | Daily Routine | Weekly Deep Clean | Pro Tip/Takeaway |
|---|---|---|---|
| Wooden Spoon | Rinse and dry | Boil in water, air out | Extends lifespan; prevents splinters |
| Metal Tongs | Scrub joints | Disassemble for crevice scrub | Removes hidden gunk |
| Chef’s Knife | Wipe, hand-wash | Sharpen and oil blade | Improves safety and precision |
| Baking Whisk | Immediate soak | Clean with pipe cleaner | Clears stuck dough in wires |
| Plastic Utensil | Non-abrasive wash | Baking soda paste | Erases stains, removes odor |
Safer Prep Begins With Proper Sanitizing Strategies
Applying utensil cleaning hacks with sanitation in mind, you’ll cut food safety risks and keep your kitchen healthier. Preventing cross-contamination is a must when switching between proteins, produce, and cooked foods.
Professionals make sanitizing a step as regular as washing hands. Disinfecting isn’t just about using harsh chemicals—in fact, there are natural approaches that work just as well for daily routines.
Tried-and-True Sanitizing Steps Keep Germs Down
Fill a sink with hot water and mix in a tablespoon of unscented bleach per gallon. Immerse metal utensils for one minute, then rinse well and air-dry. This method guarantees you’re hitting germ-prone areas reliably, especially on high-use items like spatulas and ladles.
- Sanitize after handling raw meat—use a bleach solution so bacteria isn’t transferred. This step is non-negotiable in professional kitchens.
- Use 3% hydrogen peroxide for plastic and silicone utensils—pour directly and let sit for five minutes before rinsing. Odor is eliminated along with germs.
- Boil wooden tools for five minutes weekly—kills residual bacteria and freshens wood. This keeps natural tools food-safe.
- Clean knife handles with alcohol wipes—removes spills plus disinfects without soaking.
- Dry all items upright—airflow prevents bacteria from developing moisture-related mold or musty smells.
Following each step gives every utensil a fresh start for the next use, and rewards your attention to detail with a cleaner, safer cooking space.
Natural Options Can Satisfy Daily Cleanliness and Environmental Goals
Lemon juice and vinegar aren’t just for cooking. Pros use these for acid-based cleaning of stains and for their antimicrobial properties. Pour vinegar onto a cutting board and scrub with kosher salt for a double-duty disinfectant and deodorizer.
- Soak utensils in a 1:1 vinegar-water solution for fifteen minutes—destroys most germs and removes buildup without harsh chemicals.
- Rub lemon wedges over stainless steel—restores shine plus eliminates odors from onions or garlic.
- Use baking soda as a paste—especially effective for removing greasy film on spatulas or tongs.
- Boil utensils for protein residue—clears stubborn egg or dough stuck between wire whisks.
- Rinse thoroughly after natural cleaning—prevents residual taste and ensures tools are ready for next use.
Naturally cleaned utensils support health and eco-friendly kitchen goals, adding peace of mind every session.
Smart Storage Prevents Redirtying and Extends Tool Life
Organized storage helps utensils stay cleaner, longer, reducing repeat washing. Pros swear by hacks that not only keep drawers tidy but also protect tool longevity and kitchen safety after cleaning.
Choosing storage means planning for airflow, sharp edges, and minimizing tool overlap so nothing gets scratched or mashed after drying. This preserves both hygiene and the finish of your utensils between uses.
Standing Racks Keep Utensils Upright and Dry Faster
Instead of tossing spatulas or tongs flat in a drawer, use a standing rack where tools dry fully and air circulates all around. “I slot cleaned whisks here—nothing touches,” you might say, confident that avoiding stacked contact means fewer smudges and mold.
Drying racks with wide spacing help manage water spots and let steam escape from deep utensils. After a heavy-use cooking day, leave cleaned tools upright for thirty minutes before putting them away.
The upright approach imitates dish-drying in professional kitchens, where speed, safety, and hygiene are priorities. It’s a habit worth adopting even in small home kitchens for the same lasting benefits.
Knife Guards and Dividers Eliminate Accidental Nicks
Professional chefs use blade guards or drawer dividers for knives, making it impossible to grab a handle and cut yourself unexpectedly. “Place blades up, handles out,” becomes the self-protecting phrase, making retrieval safe and simple after cleaning.
Dividers or trays keep utensils from rattling and scraping metal against metal. This not only keeps edges sharp but prevents rust from developing in moist, crowded spaces. Affordable drawer organizers or bamboo trays outlast plastic baskets and promote safety.
Adopting this habit ensures your utensils last for years, maintaining their function and appearance without chips, dullness, or hidden grime from cramped storage.
Consistent Care Brings Lasting Results in Every Kitchen
Effective utensil cleaning hacks extend beyond spotless finishes. They deliver safety, efficiency, and the satisfaction of knowing every tool is ready at a moment’s notice. These practices sustain quality, whether you’re prepping solo meals or running a busy crew.
Every time you embrace these professional techniques, you reinforce habits that protect your investment in kitchen tools and safeguard everyone at the table. Adopting these hacks rewires cleanup from a chore to a simple, habitual step in home or commercial kitchens.
Invest your time in mindful maintenance and see cleaner results every day. Enjoy a kitchen where every utensil feels as reliable as when it was brand-new. Let these utensil cleaning hacks settle into your routine and elevate every meal you create.
Frequently Asked Questions
- How do I eliminate stubborn odors from wooden spoons?
Rub a cut lemon over the spoon or soak it in vinegar for 20 minutes, then air-dry fully. This removes musty or food odors without damaging the wood fibers or finish. - What’s the safest way to clean knives every day?
Hand-wash immediately after use, dry with a towel instead of air-drying, and store in a knife block or with blade covers. Avoid the dishwasher, which damages the blade and handle over time. - Can I sanitize utensils without bleach?
Soak items in a hot water and white vinegar solution for 10–15 minutes, then rinse thoroughly. This hack both disinfects and removes light stains naturally, making it a favorite among professionals and natural cleaners alike. - How should I store utensils to keep them hygienic?
Upright racks or spaced dividers work best—ensure utensils are fully dry before storing. This prevents cross-contact, discourages mold, and keeps surfaces from collecting new germs before your next cooking session. - What utensil cleaning hacks handle stuck-on residue quickly?
Soak in hot soapy water immediately, use a baking soda paste or scrub with kosher salt and lemon for tough spots, and finish by rinsing well. These hacks minimize elbow grease while delivering a sparkling finish.