
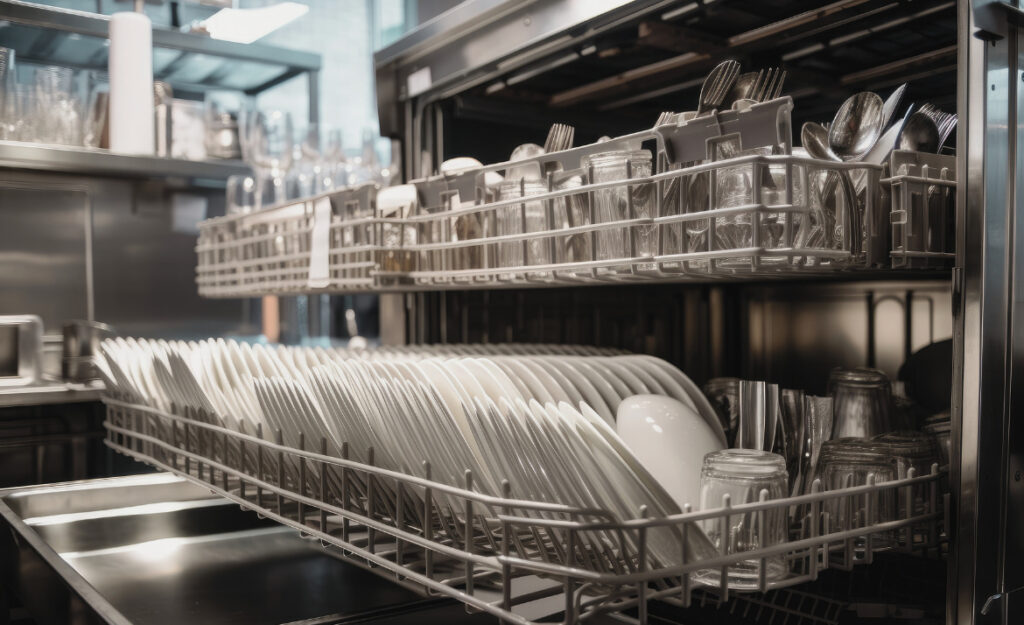
Stepping into the hustle of an industrial kitchen, every minute counts. Nobody wants racks of plates coming out damp when the clock is ticking. Many teams puzzle over how to improve drying performance in dishwashers, especially when there’s a mountain of dinnerware waiting.
Consistently dry dishes are critical—not just for guest satisfaction, but for hygiene and workflow. When items go into storage or onto the line wet, it sets off a chain reaction, from water spots to workflow delays. This challenge lands on kitchen managers’ laps every service.
Small tweaks in approach can stack up to big gains. Let’s explore practical steps and specific scenarios where you can improve drying performance with methods you can use right away.
Routine tweaks that boost drying every cycle
Effective industrial dishwashers perform best with maintenance habits built into staff routines. This safeguards against dropped standards during rush shifts and prevents wasted time drying manually before restocking.
If your checklist skips maintenance, moisture lingers and streaks appear. Make these tweaks part of daily open and close routines. Your team won’t need reminders—just results.
Inspecting and cleaning spray arms regularly
Each morning, one person should spin the spray arms and check for food scraps or scale. Even small clogs redirect water, soaking instead of rinsing. Clean clogs before starting cycles for even, thorough drying.
Poorly cleaned arms lead to droplets pooling inside cups and bowls—improving drying performance dishwashers provide is impossible without even water distribution. Wipe with a soft brush, ensuring all nozzles are clear.
If a nozzle clogs repeatedly, use a thin wire for clearing. Don’t whack or bend; gentle, patient cleaning protects delicate engineering and secures long-term drying results after every wash.
Checking filters and drain screens
A blocked filter means particles and grease recirculate during the rinse cycle. As grime clings to dishes, water lingers, causing incomplete drying and streaks on glassware and utensils.
Pop out filters each shift. Rinse thoroughly and replace straight—no sideways jams. A clean filter guarantees that rinse cycles fully clear dirty water for crisp, quick drying cycles.
Adding this step to your prep means every wash starts with optimized flow. Explain to new staff that even a few crumbs double drying time, anchoring this habit with cause-and-effect logic from day one.
| Maintenance Task | Frequency | Drying Impact | Action Step |
|---|---|---|---|
| Clean spray arms | Daily | Eliminates pooling and residual streaks | Remove arms and rinse, inspect for scale |
| Filter and drain check | Every shift | Ensures only fresh water on final rinse | Rinse and replace securely |
| Door gasket wipe | Daily | Prevents gaps causing extra humidity | Use damp cloth, check for splits |
| Inspect heating element | Weekly | Secures stable temperatures for evaporation | Look for scale buildup, schedule descaling |
| Refill rinse aid | Every day/after 10 cycles | Provides uniform water sheeting for fast drying | Check level and refill as needed |
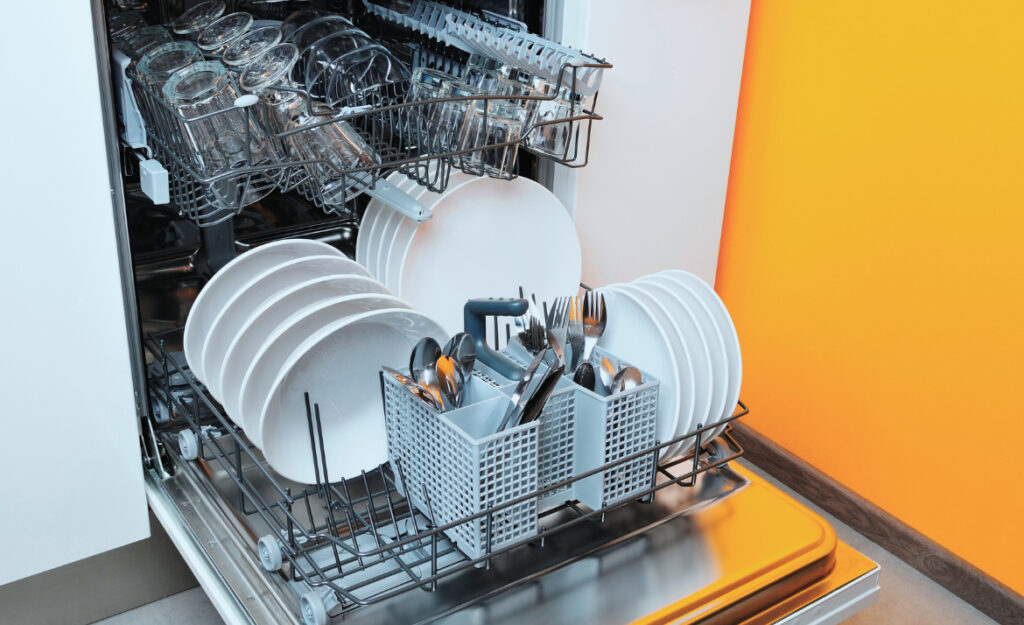
Fine-tuning dish placement for best airflow
Every rack loaded in an industrial dishwasher affects how hot air moves—this isn’t a theory, but a visible result. Teams that rush stacking sacrifice drying consistency for short-term speed.
Improving drying performance dishwashers achieve means placing items to maximize open spaces. Practice makes this a reflex—not a burden—especially during busy hours.
Common loading patterns that undermine drying
Nested bowls and stacked pans block air movement, trapping steam that later condenses as droplets. Intensive stacking to “fit one more plate” guarantees moist cutlery and stuck-on water spots.
- Space-plate loading: Place plates upright without overlapping, improving hot air flow.
- Separate utensils: Sort cutlery to prevent water pools in spoons or forks.
- Bowl-facing: Angle bowls downward for natural drainage, avoiding puddled bases.
- Single-tray plastics: Only one layer of light materials per rack for even drying.
- Uncover vents: Align racks so vents remain free, promoting air exchange inside the machine.
Consistency in placement ensures each item dries fully. Remind staff with a ten-second visual sweep before starting each wash.
Correcting bad habits with staff training
Training prevents old habits from undermining drying results. Show new hires the exact rack layout with real plates, noting how gaps let air reach all surfaces and reduce rework later.
- Pull aside overloaded racks to repack if necessary. Never let a poorly stacked batch run—wet returns waste more time than a quick reset.
- Praise team members who take ten extra seconds to ensure every cup sits at the right angle. Positive reinforcement makes new habits stick.
- Tag laminated guides above each dishwasher: visuals streamline retraining when staff rotate between shifts or sites and anchor technique in muscle memory.
- Encourage callouts in pre-shift huddles: “Let’s keep racks neat for dry glass every time.” Make standards a team value, not a top-down command.
- Reward improvements by tracking output over weeks: dry dishes returned to storage are noted successes, celebrated as concrete wins for the team.
Over time, teams internalize effective loading as part of their standard craft, boosting both pride and drying consistency.
Adjusting temperature and humidity for powerful drying gains
Drying power in industrial dishwashers depends on temperature control and internal humidity. The right settings lead to fast, spot-free results that stand up to the standards of high-volume kitchens.
Improving drying performance dishwashers deliver involves managing these variables proactively. You don’t need to wait for a “perfect” machine—adjust routines and settings to match operational demands right now.
Dialing in rinse temperature for faster evaporation
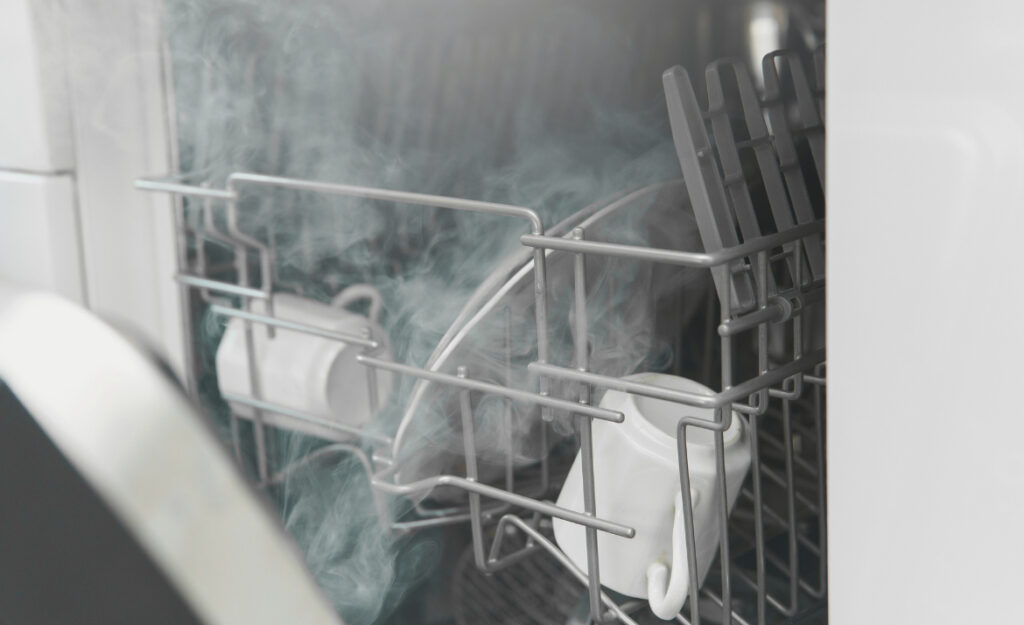
Set final rinse temperature between 180–194°F for best results. This ensures thorough sanitization while causing water to bead up and evaporate rapidly after the cycle.
If your industrial dishwasher consistently finishes with cooler-than-expected surfaces, verify water supply and element function. Watch for staff making manual resets to speed up cycles—remind them that lower temperatures undermine every drying effort.
Post-adjustment, check dishes—run a finger across a plate a minute after the cycle. If it’s only lightly moist and air-drying completes within seconds, you’ve optimized the setting.
Balancing airflow with exhaust or vent settings
A strong exhaust fan draws away steam but heavy settings sometimes pull in cold air, reducing drying efficiency unexpectedly. Balance airflow by adjusting dampers to suit daily volume and environmental conditions.
If your dishwasher allows, time exhaust to kick in right after cycles, not during. This maintains heat until racks begin cooling. Over-aggressive venting yields faster moisture condensation, so time adjustments to fit kitchen traffic.
For wall-vented setups, confirm filters are clean and ducts clear. Even strong units struggle to vent moisture if a clogged pathway rebuffs their efforts. Include vent checks in weekly walk-throughs for tangible drying gains.
Optimizing rinse aid dosing for streak-free finishes
Dialed-in rinse aid makes a demonstrable difference. Use too little and water clings; too much leads to streaks or sticky residue. The impact appears quickly after small changes.
Improving drying performance dishwashers supply hinges on this balance—adjust dosing based on real cycle outcomes instead of relying solely on manufacturer defaults.
Test-dosing for effective water sheeting
Add a bit more rinse aid and check for how water beads and slides off glassware during the final rinse. Too much will leave a film; too little, stubborn droplets.
Cycle through several loads, noting which settings yield plates that emerge nearly dry and utensils with no water spotted. Log the “sweet spot” on a wall chart near the machine for shift consistency.
If glassware appears vaguely cloudy after drying or feels tacky, dial back a notch and recheck. Fine-tuning takes only minutes, but the drying performance leap is significant.
Switching products and monitoring effects
Switching to a new rinse aid? Don’t assume identical dosing. Give staff a heads up and run test batches by meal period, noting the finish on sample glassware of different brands or ages.
Track changes in drying time and residue levels, updating your posted guides as needed. This prevents confusion, especially with temporary staff or shift swaps. Always conclude tests with a clear “best-use” instruction pinned above refill stations.
Make sure all changes are communicated by posting updates at both the dish station and kitchen manager’s office where everyone can review them daily.
Leveraging quick cycle adjustments for instant improvements
Quick adjustments deliver immediate returns. Adapt cycle types and drying times according to meal pace or soiling levels rather than setting once and forgetting. In practice, this means moving from theory to clear, repeatable habits.
If you’re aiming to consistently improve drying performance, train staff to compare preset options and select the cycle matched to dish load and desired result every shift.
Picking optimal cycle settings in busy service
During lunch rushes, prioritizing drying sometimes means switching to a slightly longer cycle if the final result is crucial for immediate restocking. Observe dish exit quality, then select Normal or Heavy for heavily soiled returns—even if it adds a minute or two.
Poorly dried glasses sent back to storage are harder to fix later. Explain to line staff that “Cycle B dries better for busy setups,” reinforcing decision-making during the workday pulse. Mark preferred cycles with colored stickers on control panels.
Validate the results every hour by eye and touch—feedback carries weight and encourages proactive adjustments in real time. Track output metrics to fine-tune cycle choices by shift or daypart over the week.
Adapting drying extensions for different materials
Not all kitchenware dries the same. Lightweight plastics, silicone items, or pans with thick lips hold onto water longer. Adapt drying times through built-in extension features or by opening doors briefly to speed evaporation as needed.
During low-volume periods, add custom drying cycles for items with persistent moisture issues. Align extension use with wet-spot checks after unloading, and record your “winning combo” to guide all team members.
Empower staff to advocate for extra drying finally, not after the fact—the goal is every plate, cup, and tool leaves the station ready for service within minutes.
Addressing hardware factors for rapid drying upgrades
Some drying gaps come down to hardware. Poor gaskets, loose doors, or failing heaters waste staff effort no matter how strong the team’s discipline. Address these details head-on for rapid improvement and long-term consistency.
Improving drying performance dishwashers deliver may require prompt part replacement and regular inspections far more frequently than manufacturer guides suggest—especially under heavy use.
Repairing seals and checking hinges
If you notice steam escaping or pooled water at the door after cycles, immediately inspect the gasket for cracks or flattening. Replace or reshape as needed to ensure a tight seal.
When a door fails to latch firmly, steam seeps out and lingering humidity pools on dishes. Tighten hinges and check alignment; even minor sag means moisture escapes at critical drying points.
Worked correctly, these repairs spike the effectiveness of every drying cycle without waiting for a major breakdown. Add hinge and seal checks to daily walk-throughs for dependable results.
Upgrading heating elements before they fail
Underperforming heating elements rarely fail dramatically—they just produce slightly cooler drying conditions, bit by bit. Monitor drying times, and if cycles start extending or racks emerge damp, schedule element tests immediately.
Stock a spare heating unit onsite when possible. This minimizes downtime and lets you swap out weak components before complaints surface (or resort to towel drying during service).
Keep a logbook: every replacement and adjustment recorded helps spot patterns and justifies preventive upgrades for other machines across your kitchen group or facility.
FAQs
- How can I quickly spot a dishwasher causing drying problems?
If you notice consistently damp spots or water droplets after every cycle, test that machine by swapping racks to another unit. If the problem persists, you’re dealing with a machine-specific issue. This check isolates faults fast in busy kitchens. - What should I do if plastic items never fully dry?
Lightweight plastics repel heat differently and tend to hold droplets. Use single layers, position items so they drain easily, and select extended drying cycles for those racks only. Adding a brief, supervised open-door period at the cycle’s end can also help. - Does switching rinse aid brand affect drying power?
Different rinse aids have unique formulations that change how water sheets or beads during drying. When switching brands, monitor dishes during the very next few loads. Adjust dosage and document outcomes to find your new ideal setting. - Can overloading racks ruin drying every time?
Yes, stacking plates, bowls, or glasses too tightly traps steam, causing water to pool and slowing evaporation. Even in a rush, keeping some space between each item is crucial for the circulation industrial machines depend on for quick, thorough drying. - How much maintenance does a dishwasher need for top drying?
Daily routines make the most difference—quick checks before and after shifts on spray arms, filters, and gaskets. Schedule weekly deep cleans, heating element inspection, and run ventilation tests. Persistent, small habits lead to major drying improvements every week.