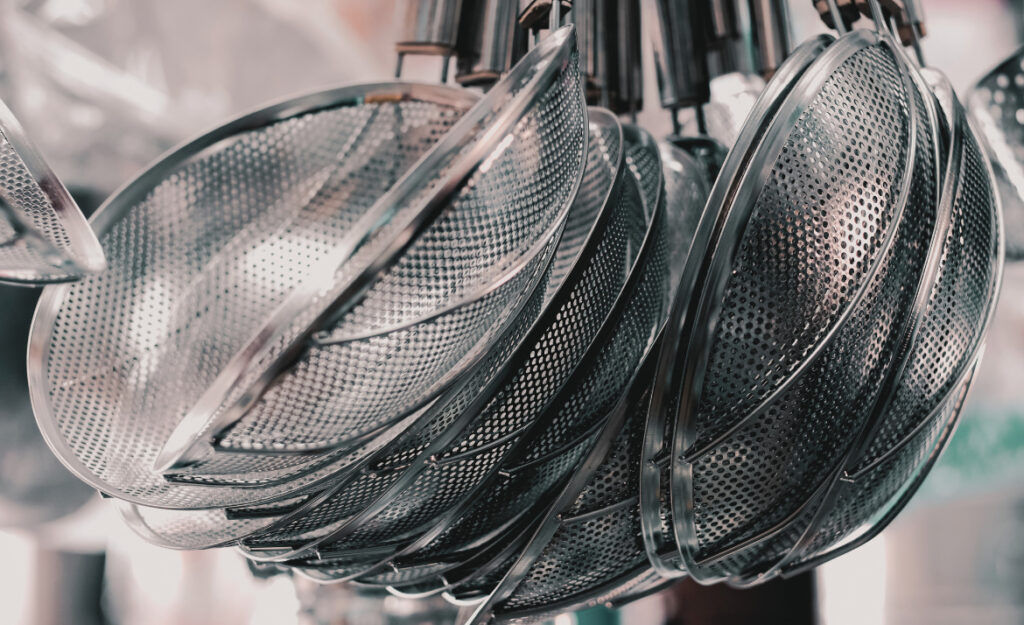
A stubborn mesh strainer can slow dinner prep and frustrate even the neatest cooks. That’s why people search for solutions and techniques to deep clean strainers sieves so their tools perform like new.
Fresh, safe food relies on the hidden work of maintaining strainers and sieves. If you let grime or old food cling to tiny holes, you risk dull flavors, lingering odors, or, worse, unsafe utensils near your ingredients.
This guide gives practical ways to deep clean strainers sieves, showing why meticulous upkeep makes daily cooking smoother—and safer. Read on to discover simple, tested strategies for every kitchen.
Getting Started: Setting Yourself Up for Effective Strainer Cleaning
When you deep clean strainers sieves, it’s easiest to start with a setup that lets you work efficiently. Having everything ready speeds up the process and ensures thoroughness.
Gather all your tools. Place a large bowl in the sink, fill it with hot water, and keep a soft sponge, a stiff brush, baking soda, and mild dish soap within reach.
Proper Workspace Prep Yields Cleaner Results
Before you even touch your dirty strainers, clear counter space and roll up your sleeves. A clutter-free workspace translates to focus on scrubbing every mesh pocket clean.
This small setup habit mimics a chef’s routine: laying out cleaned utensils in a logical order, with deep clean strainers sieves marked for scrubbing as you go.
Just as a chef checks knives before slicing, check your workspace and cleaning products before you wash. You’ll be less likely to skip steps or overlook grime stuck in the mesh.
Choosing Safe Cleaning Agents and Appropriate Brushes
Select a soft-bristle brush for gentle mesh and a stiffer brush for sturdy metal. Baking soda removes odor and breaks down residue without scratching surfaces.
Non-abrasive dish soaps dissolve grease safely. Skip anything scented or harsh that could leave a film or flavor behind once you deep clean strainers sieves.
Pair each strainer type with the right brush: fine mesh needs nylon or natural bristles, while rugged wire withstands firmer scrubbing. Keeping supplies sorted ensures no damage.
| Tool Type | Brush Type | Best Cleaning Agent | What To Do Next |
|---|---|---|---|
| Fine Mesh Strainer | Nylon Brush | Baking Soda & Soapy Water | Soak, brush gently |
| Stainless Steel Sieve | Stiff Bristle Brush | Diluted Vinegar | Scrub and rinse |
| Plastic Strainer | Sponge or Soft Brush | Mild Dish Soap | Wash thoroughly |
| Tea Infuser | Toothbrush | Baking Soda Paste | Detail clean |
| Colander | Dish Brush | Degreasing Soap | Rinse and dry |
Dislodging Residue: Removing Food Traps and Hidden Debris
To deep clean strainers sieves, focus first on loosening food particles, seeds, and starch films. This primes the mesh for real washing and prevents buildup from returning quickly.
Shake the strainer over the trash, then tap it gently with the brush. Hold it under running water, rotating so streams reach every gap—especially on fine metal mesh.
Soaking for Maximum Debris Removal
Submerge strainers in very hot water mixed with dish soap. Leave them for 10–20 minutes so dried food softens and dislodges more easily during brushing.
- Submerge immediately after use for less scrubbing—timing matters when preventing stubborn crusts.
- Rotate and agitate the strainer in the water for more contact between cleaning solution and trapped residue.
- Watch for bubbles escaping when air pockets release—this is a sign you’re soaking thoroughly and water is entering each mesh space.
- Add a tablespoon of baking soda if the odor persists—baking soda bonds to particles and lifts them away when you rinse.
- Use gloves to protect your hands when handling very hot or degreasing water. This keeps the process comfortable from start to finish.
Scrubbing after soaking becomes easier and exposes any residue missed in the soak. Visual inspection after rinsing tells you if you’re ready for the next stage.
Using Tools for Deep Entrapments
Tough debris may need targeted action. Pointed wooden skewers dig out seeds stuck in corners. Toothpicks or dental picks work for tougher mesh.
- Insert the pick from the mesh’s back—push forward to clear trapped bits.
- Avoid metal picks on delicate mesh; nylon or wood protects fine wires from damage.
- Repeat motions around tough spots, then immediately rinse to flush debris out.
- If mesh warps, stop and realign it so future cleanings remain straightforward.
- Always follow up with a soft brush and more rinsing before drying.
Trust your fingers: run them over the mesh. If you feel resistance or grit, repeat your steps before air-drying or storing the tool.
Removing Odors and Stains: Banishing Lingering Smells and Discoloration
Once you’ve deep cleaned strainers sieves and visible debris is gone, address odors left by onions, garlic, or coffee. Act quickly to flush these scents before they settle into metal or plastic mesh.
Apply a slurry of baking soda and water—thick enough to cling without dripping—across the entire surface. Let it sit for at least five minutes before rinsing in hot water.
Targeting Stubborn Color and Scents
Odor clings to mesh. Make a paste of lemon juice and baking soda for citrus freshness. Spread it across stains, then rub in circles before rinsing with more lemon water.
If you’ve strained tomato sauce or turmeric, direct sunlight helps bleach minor discoloration. Place your cleaned, wet sieve outside for an hour before air-drying indoors.
For deep stains, soak mesh in vinegar-water (1:3 ratio) for twenty minutes. Rinse thoroughly—the vinegar breaks down proteins and neutralizes lingering smells naturally.
Routine Maintenance Prevents Recurring Issues
Clean immediately after each use. Even if you’re rushing, swipe food away so it never dries onto the mesh.
Monthly deep clean strainers sieves sessions minimize permanent stains. Mark your calendar or keep a small reminder card near your dish soap.
Replace any mesh that remains stained or develops an odor after repeated treatments. This signals the metal or plastic has absorbed too many particles over time.
Smart Drying and Storage: Keeping Strainers Pristine Between Uses
Proper drying techniques keep deep clean strainers sieves fresh and prevent rust or mildew. Stand each strainer upright in a dish rack, letting air reach every part of the mesh.
Don’t nest wet strainers; this creates a breeding ground for bacteria. Instead, space each one so drying is complete before storage.
Quick-Drying Routines for Busy Kitchens
After rinsing, shake excess water from your sieve. Use a lint-free cloth to pat both sides dry—especially on handles or rims where moisture collects.
Fan dryers or a sunny windowsill speed up the process for mesh that tends to hold water. Flip strainers halfway through so both sides dry evenly without creating water spots.
In humid kitchens, place a packet of silica gel in the utensil drawer where you store deep clean strainers sieves. It absorbs lingering moisture between uses and keeps metal looking new.
Preventing Rust and Wire Damage With Simple Habits
Rust forms on wire mesh when moisture lingers—especially if strainers aren’t cleaned or dried properly. Small habits go far in preventing costly replacements later.
Always rinse deep clean strainers sieves after using acidic foods like tomato sauce or vinegar; acids corrode metal faster than plain water or oil-based liquids.
Storing Mesh Strainers to Minimize Wear
Hang your strainers on wall hooks or place them upright in a divided utensil holder. Never force fine mesh into tight drawers where wires might bend or break.
Avoid direct contact with cast iron or carbon steel—these metals shed particles that start corrosion on otherwise clean mesh.
If you spot a weak wire, pinch it gently back into shape using needle-nose pliers, then watch for signs of further damage over time.
Quick Repair Steps for Everyday Mishaps
Spot rust early by examining handles and frame seams every week—catching orange specks before they turn into flakes protects the entire tool.
If you see surface rust, scrub gently with baking soda paste. Rinse, dry, and re-oil with food-safe mineral oil around joints and frames.
For sharp broken wires, discard the sieve rather than risk scratches during future cooking. Prioritizing safety extends your tools’ and recipes’ quality.
Optimizing Cleaning for Different Strainer and Sieve Types
Each deep clean strainers sieves routine changes slightly with the tool’s material and intended use. Adapting your methods makes the process safer and extends your utensils’ life.
Stainless steel can withstand energetic scrubbing and hot water, while plastic buckles under heat or abrasion. Flexibility matters when applying pressure or selecting soaps for each version.
Assessing Fine vs. Chunky Mesh
Fine mesh—like for sifting flour—needs a gentle touch and tiny brush bristles. Use compressed air for quick flour removal between deeper soaks, especially during baking marathons.
Chunky mesh sieves, designed for broth or pasta draining, benefit from stronger bristles and a faster, “swirl and shake” approach in warm water with mild soap.
Be mindful of handles and seams. Plastic can split with physical force; metal mesh will eventually snap at a weak joint if scrubbed too aggressively too often.
Specialty Strainers: Tea, Chinois, and Tamis
Tea strainers need a toothbrush and regular vinegar soaks because tannins build up quickly. Use quick circular motion—don’t jab or flatten mesh fibers inward.
Chinois and Tamis, bigger and used for purees, require a spatula to scrape residue before soaking. Don’t use harsh detergents on these specialty tools; they can change the finish.
Double-check any patterned, vintage, or wooden-handled mesh—wipe the handles thoroughly, never let them soak, and apply a food-safe oil occasionally.
Lasting Clean: Maintaining a Long-Term Deep Cleaning Habit
Regular, thorough attention ensures strainers remain safe and easy to use. Build cleaning into your kitchen routine—attach it to dishwashing or lunch prep, so it becomes second nature.
By setting a repeating schedule, you never wonder if it’s time for a deep clean strainers sieves session. Mark a calendar, or simply tackle all mesh utensils at week’s end.
Consider treating new strainers with extra care immediately: less buildup means easier cleaning for years to come. Eventually, even emergency cleanups take less time and effort.
Passing along these methods helps everyone at home keep kitchen tools ready for action: Kids learn by watching you deep clean strainers sieves after Sunday spaghetti, and soon they help too.
Keep a short list on your fridge or pantry door—six steps to deep clean strainers sieves—and check them off as you go to cement this habit in your daily workflow.
Frequently Asked Questions
Why does food always stick to my mesh strainer, no matter what I use it for?
Finer mesh traps starches and tiny food bits, especially from pasta or flours. Immediate rinsing, plus soaking and regular deep clean strainers sieves routines, minimize clogs and prevent dried-on residue.
How do I know when a strainer is too worn for deep cleaning and should be replaced?
Look for visible breaks, bent mesh, or stubborn stains and smells after cleaning. If these persist despite your best efforts, safe and hygienic cooking requires replacing the tool.
Can dishwashers deep clean strainers sieves as well as hand washing?
Dishwashers work for heavy-duty stainless mesh, but hand-cleaning reaches trapped food quicker. Delicate mesh or wood-handled strainers should always be cleaned by hand for safety and longevity.
What’s the safest way to remove rust from a wire strainer?
Make a thick paste of baking soda and water, applying it to rusty spots. Scrub gently with a soft brush, rinse thoroughly, and dry immediately to avoid reoccurrence.
Is there a homemade solution for odor that lingers in a plastic sieve?
Soak in a 1:3 white vinegar-water mixture for 15–20 minutes. Rinse well, then air-dry in sunlight. This natural acid removes odors and prevents plastic from absorbing future smells.