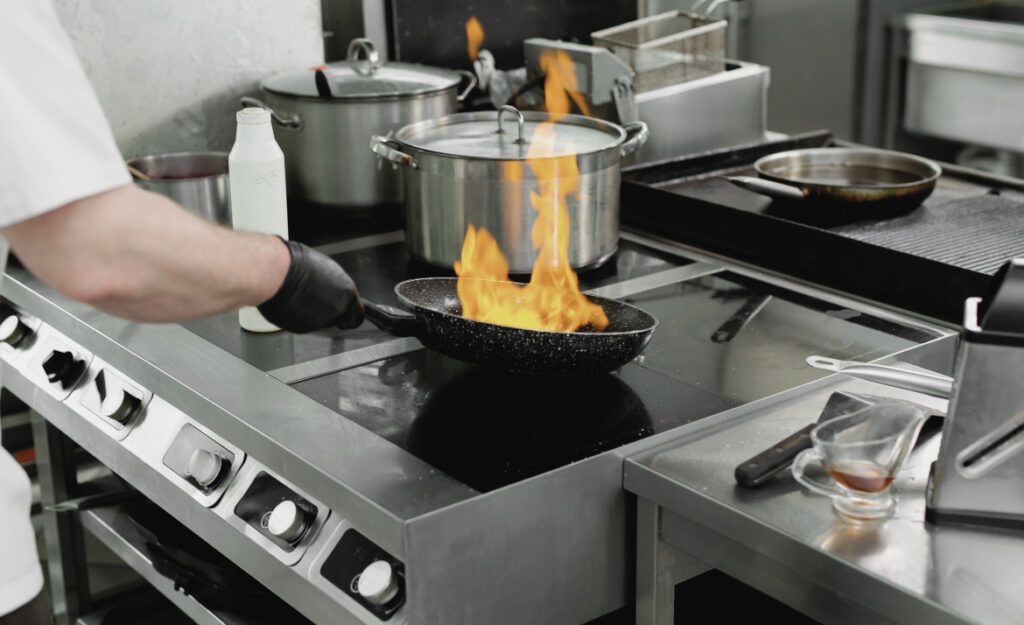

Reliably running an industrial kitchen means never letting the small problems linger, especially when they influence productivity. Mid-shift, if someone reports uneven baking or higher utility bills, the cause might trace back to oven door seal problems—a detail that’s easy to miss but hard to ignore once it surfaces. Over time, small gaps or buildup at the oven seal add up to wasted energy, inconsistent cooking, and extra cleaning.
Knowing how to spot and fix oven door seal problems should sit on any kitchen supervisor’s must-have list. These seals remain an essential, though often overlooked, element that directly shapes efficiency and food quality. Noticing escaping heat or stubborn sticky residue can mark the first step toward a simple, effective solution that saves significant maintenance time.
This article breaks down practical approaches for identifying, fixing, and preventing oven door seal issues in industrial kitchens. You’ll find stepwise instructions, memorable examples, and tables that help you sort through which fixes to try first. Let’s turn this recurring headache into another quick win for your operation.
Pinpointing Seal Issues With Simple Kitchen Scripts
Systematically identifying oven door seal problems keeps disruptions minimal while ensuring rapid intervention. Monitoring physical signals and using precise language makes troubleshooting more consistent and less stressful for busy staff.
Effective terminology, such as “I can feel heat escaping along the bottom when the door is closed” or “There’s a visible split in the gasket,” cuts ambiguity and helps maintenance teams prioritize.
When Inspection Reveals Leaks
During a routine midday cleanup, a line cook palms the door edge and says, “This spot feels hot,” then points to a visible gap. Repeating this script when symptoms arise ensures clear communication and fast decisions.
Next, use a flashlight in a dim room, shutting the oven door and observing light leaks around the seal. Any bright spot signals a gap, valuable for pinpointing exactly what portion requires attention.
If steam accumulates where it shouldn’t, or you spot baked residue at the door edges, those are real-world clues telling you the seal integrity is compromised. Record these findings and move to targeted fixes.
The Visual Comparison Checklist
Lay a finger along the seam, feeling for areas where the gasket compresses differently—a sure sign some sections are worn out. Each unusual texture can reveal early damage before breakdown occurs.
Compare suspect seals against a functioning oven next door. If one feels much stiffer or even sticky, you’ll want to schedule a clean or replacement part right away. This minimizes extended downtime.
If the seal’s edge curls or cracks on bending, imagine a door weatherstrip on an old delivery truck. Replace that section just as you’d fix the door—snap in the new strip, test with a light tug, and confirm it holds without gaps.
| Symptom | What to Look For | Common Cause | Recommended Response |
|---|---|---|---|
| Excessive external heat | Palm feels hot at door edge | Seal compression loss | Inspect and test with light or paper |
| Visible smoke/steam leaks | Mist escapes door area | Worn or cracked gasket | Replace faulty section |
| Sticky residue on edges | Baked-on debris substance | Seal not sitting flush | Clean and adjust door alignment |
| Uneven cooking pattern | Food near door undercooked | Heat escaping through gap | Run inspection routine |
| Unusual noise on closing | Clicks or thuds at finish | Seal misaligned or compressed | Readjust hinge/seal |
Clearing Everyday Buildup and Extending Seal Life
Removing debris and oily residues improves seal longevity and heat containment. Industrial kitchen staff benefit from integrating straightforward cleaning scripts into their daily routines for best results.
Grime and food residue act like sandpaper over time, grinding down rubber and foam seals until the oven leaks. Regular, guided cleaning addresses this risk directly and reduces future maintenance costs.
Stay-Ahead Cleaning Habits
After the lunch rush, when everything cools, wipe the door edge with a damp microfiber cloth. Emphasize the routine: “Once a shift, quick clean here keeps ovens reliable.” Repeat after visible spill events, not just at day’s end.
- Wipe with warm, soapy water to eliminate grime buildup; acts as preventative care against early damage; finish by drying the seal thoroughly with a clean towel.
- Use a plastic spatula to gently scrape away baked-on food bits; avoids seal tearing or pulling; complete the task before reheating.
- Inspect for food particles trapped in creases; prevents long-term compression or misalignment; run a fingertip check for unseen debris after wiping.
- Apply a mild degreaser formulated for kitchen equipment (never bleach); helps keep the rubber supple and stretchy; rinse thoroughly after use to avoid sticky residue.
- Establish a kitchen cleaning log, noting any resistant debris or minor damages; keeps tasks accounted for between staffs; review at least weekly.
When everyone adopts these steps, even a crowded kitchen keeps oven door seal problems at bay, making breakdowns much less disruptive.
Spot-Treating Persistent Build-up
For residue that resists regular cleaning, soak a cloth in a 50/50 vinegar-water mix, press it on the affected area for a minute, then scrub lightly. Repeat weekly for high-use ovens.
- Target sticky corners first, where gaskets meet metal; focus attention for best results; run your knuckle along to feel for lingering debris.
- Switch to a non-scratch scrubbing pad if the buildup doesn’t budge; avoid steel wool or abrasives that carve into the seal.
- Dry thoroughly with the oven slightly ajar; stopping moisture keeps seals soft and reduces mold growth.
- If odor lingers after cleaning, leave the oven open to ventilate before relighting.
- Reinspect after 24 hours; ensure all sticky spots are cleared before next heavy use.
Staff following this protocol reduce stubborn oven door seal problems and lengthen intervals between professional maintenance calls.
Seating Seals and Aligning Hinges for Lasting Performance
When seals slump or shift, re-aligning them saves wasted energy and preserves internal oven temperature. Taking action as soon as misalignment appears ensures consistent cooking results across large meal batches.
If the oven door catches at the end of its swing, the hinges or gasket may be out of place, risking permanent seal damage if ignored.
Readjusting Hinges for a Tighter Close
Loosen mounting screws on the door, press the handle until the seal sits flush, and retighten. The difference is noticeable—no uneven pressure or warped edges once you’re done.
Ask a colleague to press gently on the opposite corner while you work. This creates a balanced fit, preventing one side from bowing or compressing more than the other.
Test your result using the “dollar bill trick”: shut the bill in different spots around the door. If it pulls out too easily, readjust that section for best performance.
Securing the Seal With Minimal Downtime
If the gasket pops loose, clean the contact area with rubbing alcohol before reseating. Press the seal in firmly along the full door edge, waiting ten minutes before further testing.
Recruit a second person to push the seal into its groove as you check the alignment. State, “Let’s make sure each inch tucks in without gaps,” to prevent overlooked spots and help new staff learn.
After reinstalling, observe during a short preheat: monitor for steam or heat loss at any seam. If new gaps emerge, repeat the process, focusing on problem zones until airtight.
Choosing Replacement Seals With Confidence
When a seal can’t recover shape or integrity, selecting a compatible replacement makes all the difference. Comparing gaskets side by side with kitchen-specific factors ensures a perfect fit and a durable result.
Investing a few minutes matching part numbers or consulting the equipment guide helps prevent repeat problems and wasted expense down the line.
Gasket Selection Checklist
Grab the oven’s model number and locate the existing seal type: flat, rounded, or molded. Cross-reference with supplier catalogs or parts websites for exact match details and get team confirmation before ordering.
- Always check material rating; only use food-grade, high-temp silicones to meet safety codes and prevent melting.
- Measure length precisely against the old seal; mismatched sizing leads to air leaks and repeated replacements.
- Note the mounting method—clip-in, adhesive, or screw-on; prepping surfaces ahead of replacement streamlines the install.
- Order a backup seal; keeping a spare avoids emergency downtime during shifts or holidays.
- Inspect new seals for flaws or cuts before storing; return damaged parts immediately and record serials for tracking.
Following this systematic approach keeps kitchen teams confident in their fix and helps extend their oven’s lifespan.
Training the Team for Consistent Outcomes
Equipping kitchen staff with shared routines and troubleshooting scripts ensures oven door seal problems become manageable, not chronic. Clear steps ease onboarding and keep standards high no matter who’s on shift.
Assigning roles and maintaining visual cues, like posted one-page guides, lets everyone know when and how to escalate oven seal issues for immediate attention.
Onboarding and Practice Opportunities
During training, have each new staffer practice spotting and reporting a known leak with a supervisor. “If you see this gap, let me know right away,” becomes part of the kitchen’s language.
Role-play scenarios, such as simulating a poorly aligned door, give everyone a mental checklist to follow. Test responses, then offer feedback until reports are automatic and reliable.
Maintain a standing maintenance log so reports are visible—”Friday: gap at bottom right, fixed at 2 PM.” Routine entries encourage everyone to take responsibility for fast fixes without delay.
Visual Aids and Prompts
Place laminated reference cards near ovens, showcasing photos of worn versus healthy seals. Include a checklist of what to feel, see, and listen for before and after each shift.
Direct staff to snap a phone photo if unsure, circulate it via the kitchen team chat, and get a second opinion before deciding on a fix versus a full replacement.
This approach not only resolves oven door seal problems faster but also helps reinforce collaboration and shared accountability in a busy industrial kitchen. Teams that see, share, and solve together prevent future disruptions.
Adapting Solutions for Unique Kitchen Setups
Industrial kitchens vary, so not all ovens or workflows need the same response. Flexible strategies avoid wasted time while tailoring maintenance by unit type, menu, and usage patterns.
For instance, a bakery with daily roasting might need more frequent seal inspections than a kitchen primarily using steam ovens or combination units. Adapting the frequency of checks matches available resources and priorities.
Mapping Maintenance Based on Usage
Run a weekly status check for the busiest ovens, noting patterns. “Friday mornings need cleanup and gasket checks,” works well before dinner rush. Less-used equipment could go on monthly review.
If a newly hired prep cook notices odd heat on startup, log the time of day, oven model, and circumstances—this helps customize checks long-term and improves training material.
Whenever a menu shift occurs, revisit oven cleaning and inspection cadence with the team. “Adding sticky sauces means we’ll up the seal wipe-down frequency” is an actionable pivot for evolving needs.
Kitchens With Multiple Oven Types
Distinguish between convection, rotating rack, and deck ovens, noting that each has its own common points for wear. Assign responsibility by equipment type to match specific knowledge with each seal discovery scenario.
For stacked ovens, always inspect all layers—heat rises, so upper doors may conceal cracks only visible from above. Offer this as a peer-to-peer tip for new hires after shift changeover.
If the facility operates past midnight, brief night staff on faster reporting protocols, avoiding next-day surprises. Effective overnight logs make the morning shift’s fixes more targeted and efficient.
Practical Takeaways for Managing Oven Door Seal Problems
Industrial kitchens that address oven door seal problems as soon as they arise maintain better cooking consistency and energy efficiency. Each step outlined helps teams react quickly to prevent larger maintenance issues later.
Kitchens using team checklists, visual cues, and replacement part logs experience fewer disruptions, keeping their ovens running smoothly across seasonal and staffing transitions. Their investment in simple routines pays off in uptime and quality.
Actively communicating about visible or suspected seal wear fosters a culture where prevention and teamwork thrive. When everyone knows what to do and how to report, oven door seal problems turn into another manageable detail in smooth kitchen operations.
Frequently Asked Questions
How can I tell if my industrial oven door seal needs replacing?
Noticeable heat leaks, visible cracks or tears, food residue sticking to the seal, or steam escaping the edges all signal that the seal needs immediate inspection. If these signs appear, run a tactile check along the entire perimeter and schedule a replacement if you feel gaps or rigidity.
What types of oven seal materials are suitable for industrial kitchens?
Food-grade silicone or high-temperature rubber gaskets are best for industrial settings. These withstand repeated high-heat cycles, frequent cleaning, and meet health codes. Always check your manufacturer’s recommendations to avoid mismatched or unsafe replacements.
How frequently should staff inspect oven door seals?
Busy kitchens should check seals every week or after any heavy cleaning or spill incident. For less-used ovens, monthly checks may suffice. Adapting the frequency to your menu and usage patterns ensures reliability without wasted effort.
Can a misaligned oven door cause seal problems?
Yes, if hinges shift or the door warps under heavy use, seals can compress unevenly. This accelerates wear and creates new leaks. Realign hinges as soon as you notice difficulty closing the door or uneven pressure along the seal.
What’s the best way to clean stubborn residue from an oven door seal?
Use a cloth soaked in a 50/50 vinegar-water mix, pressing against the residue for one minute, then scrub gently with a non-scratch pad. Repeat weekly for best results. Avoid harsh abrasives or bleach, which degrade the gasket and shorten its lifespan.