The right mixing bowl offers more than a surface for food prep—it becomes a kitchen partner. Home cooks searching for smoother workflows eventually want to maintain mixing bowls that stay as reliable as day one, with no hidden surprises at dinnertime.
Keeping bowls in top shape means more than rinsing and stacking. Bowl stains, odors, and chips creep in unexpectedly, often after just a few hurried washes, revealing weaknesses in everyday cleaning routines.
Practical insight helps bowls last much longer. This guide organizes actionable steps for every material and scenario. Settle in, and you’ll learn exactly how to keep your favorites looking and working their best.
Building a Durable Foundation with Consistent Cleaning
Adopting precise cleaning habits transforms a stack of mixing bowls from vulnerable to robust. Follow consistent rules to keep each bowl food-safe and free from hidden buildup, stains, and risk of cross-contamination.
The most seasoned cooks say, “I never let dough dry in the bottom of my bowls.” Immediate rinsing after use prevents nearly every major cleaning hassle, from stuck-on batters to lingering garlic odors.
Choosing Cleaning Tools for Each Material
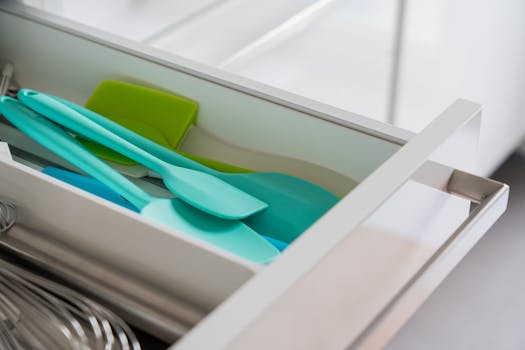
Stainless steel benefits from soft sponges and mild soaps; harsh pads scratch the finish. Glass tolerates scrubbers better but shatters if hit or dropped, so always cushion it on a towel when cleaning. Plastic scratches easily and holds onto scents; avoid abrasive brushes.
Ceramic and stoneware call for non-scratch pads and diluted soap. Strong scents fade from these materials if you air them dry, not stack them right away. Wood bowls, used less commonly, only need gentle soap and a soft cloth.
Stay mindful of tool choice by checking bowl surfaces after each wash. If you notice new scratches or cloudy spots, swap out your scrubber. A quick check takes five seconds and can save years of bowl life.
Rinsing at the Right Time
“As soon as the batter comes out, the bowl goes under water”—this kitchen mantra wards off sticky disasters. Warm water works best because it lifts fats and loosens residue without risking hairline cracks from temperature shock.
Even if you can’t do a full wash, rinse each bowl so food doesn’t crust. This single habit reduces the need for elbow grease later and cuts down on tough stains.
When transitioning between recipes in a busy session (like baking and salad prep), rinse bowls between uses to dodge flavor transfers. This habit is essential when you want sweet batters unsullied by earlier onion or pepper chunks.
Table: Mixing Bowl Material Care Requirements
| Material | Cleaning Tool | Drying Method | Care Tip |
|---|---|---|---|
| Stainless Steel | Soft sponge | Towel dry | Avoid harsh scrubbers |
| Glass | Non-abrasive pad | Air dry on towel | Prevent chips by cushioning |
| Plastic | Soft cloth | Air dry upright | Keep away from stains |
| Ceramic | Non-scratch pad | Towel dry | Turn upside down to dry fully |
| Wood | Soft cloth | Quick towel dry | Never soak or dishwasher |
Creating Safe Habits for Food Prep and Storage
Safer food prep starts with knowing what bowls handle which tasks, and why mixing bowl cross-use might invite unwanted stains or flavors. Smart cooks protect both their food and bowls by applying practical strategies at every stage.
Short scripts like “this is my bread bowl, not my salad bowl” minimize accidental wear. Assigning each bowl a job cuts down on confusion and simplifies kitchen cleanup.
Purpose-Matched Use in Real Kitchens
Matching the right bowl to the right job ensures both longevity and flavor clarity. Assign metal bowls for doughs and egg whites—they don’t absorb odors, so flavors stay pure from batch to batch.
- Keep glass bowls for acidic salads or marinades—they resist leaching and make it easy to monitor acidity stains.
- Use ceramic bowls for chilled desserts and serving foods. Avoid direct mixing of sauces or food coloring to prevent permanent stains.
- Reserve a separate plastic bowl for whisking up homemade dressings or wet batters. Mark the bottom with a piece of tape if needed, so nobody mixes it up.
- Reduce flavor and color transfer by sticking with these one-job-per-bowl rules. Crossing them only invites maintenance headaches and less-appetizing outcomes.
- “Don’t grab the wood salad bowl for last night’s pasta sauce” is a common kitchen reminder, making assignment easy for the whole household to remember.
By tying specific bowls to regular tasks, surfaces go through fewer ‘harsh’ chores, which adds years to their life. Marking bowls, if necessary, prevents accidents in busy kitchens.
Safe Storage and Organization Add-Ons
When storing mixing bowls, never nest delicate materials too tightly. Friction causes chipping and small cracks before you see visible damage. Instead, layer a soft cloth between bowls made of glass, ceramic, or wood to cushion them.
- Stack from largest to smallest, but don’t force the fit—slightly offset placement extends the rim’s life.
- Label shelves or storage spots with the most-used bowl’s photo for easy recognition, especially helpful if others use your kitchen.
- Store plastic away from direct sunlight to prevent warping and yellowing, which speed up plastic’s loss of quality and its ability to resist stains.
- Assign a spot for well-used metal bowls close to your bakeware so spills transfer quickly and don’t have time to dry in place.
- When in doubt, consult a quick sticky note above the bins: “No wet bowls stacked! Let fully dry!” Everyone benefits from simple reminders.
These steps reduce everyday wear—and the resulting need for deep cleaning—by making safety and order an obvious, habitual part of bowl use. Try specific labels or shelf markers for a smoother kitchen workflow.
Combatting Stubborn Stains and Lingering Odors
Tackling stains and odors right away prevents long-term damage and helps you maintain mixing bowls that always feel ready for any recipe. Each type of challenge calls for a targeted method.
Baking soda and lemon juice become your allies when fighting discoloration. Keeping vinegar on hand is smart—sometimes a splash and soak are the quickest fixes for both stain and smell.
DIY Solutions for Persistent Discoloration
Sprinkle a tablespoon of baking soda into your bowl, add a splash of water, and mix into a light paste. Let it sit for fifteen minutes, then gently scrub and rinse. This method draws out stains from glass, ceramic, and most plastics, without excessive abrasion.
Stainless steel recovers its shine when vinegar and water are warmed together, then applied while still hot (never boiling). Swirl the solution, wait a few minutes, and dry thoroughly with a clean towel. This method revives dull bowls and removes egg stains too.
For wood, don’t use water: Rub the cut side of a lemon over the surface, then wipe away after ten minutes. Let air dry fully before storing to keep the wood well-conditioned and fresh-scented.
Preventative Practices Against Odor Transfer
Cooling bowls upside down on racks or dish towels lets air naturally pull out lingering scents. Sprinkling dry baking soda in a thoroughly dried bowl then wiping out the next morning neutralizes most persistent odors.
Certain cooks leave a folded charcoal sachet in less-used bowls for persistent garlic or onion scents—simple and inexpensive. If a bowl still smells after these tricks, start assigning it to less ‘smell prone’ recipes in the future.
Proactive mixing bowl hygiene means less time masking flavors and more time actually enjoying the foods you create. Evaluate your bowl’s scent right after washing, so you know instantly if further deodorizing is needed before next use.
Addressing Surface Damage and Preventing Wear
Repairing minor chips, scratches, and other wear before they become real hazards helps you maintain mixing bowls for years with less stress. Noticing the first signs of damage lets you act early and extend useful life.
Visual scans after washing take just a few seconds. When cracks or chips are small, address them before daily use creates leak points or sharp spots—safety and longevity go hand in hand.
Treating and Monitoring Metal and Glassware
For stainless steel, treat new scratches with non-abrasive polish or a paste of baking soda and water. Buff with a soft cloth, then rinse. When a dent appears, flatten it only if edges are smooth—otherwise, retire the bowl for storage or decorative purposes.
Glass bowls, chipped or cracked along the rim, are best replaced. Hairline cracks often spread during mixing, especially with whisking or dough kneading. If you see cloudy discoloration, clean with white vinegar before choosing whether to keep or retire the item.
In busy kitchens, create a “last look” habit after drying. Lift each bowl up to a window or good light source—rotate and tilt to check for hairline fractures. This micro-routine ensures your next meal isn’t interrupted by a split bowl or glass chunks in dough.
Protecting Ceramics, Plastics, and Wooden Bowls
Use soft mats or cloths at the bottom of cabinets for ceramic and wood bowls. If a chip appears on ceramic, file lightly with a nail file—never sand away major damage, as it weakens the integrity.
Keep plastics out of microwaves and dishwashers if not specifically labeled as safe for such use. High heat leads to warping and stress cracks, which turn minor damage into major replacements. Wooden bowls should be checked for drying edge cracks—treat with food-safe oil to seal.
Prompt repairs and regular checks keep every mixing bowl safe and extend kitchen confidence. Make visual checks part of your cleaning rhythm so that upkeep never feels like a chore.
Mixing Bowl Myths and Facts for Effective Upkeep
Sorting myth from reality matters when you aim to maintain mixing bowls without falling for expensive or time-wasting habits. Experience and thoughtful testing bring real clarity, which translates to low-cost, hassle-free care.
Some home cooks swear “dishwasher is fine for all bowls.” In practice, most bowl types—other than steel or sturdy glass—suffer surface issues, easier cracking, or warping after repeated cycles, making hand-washing the safer bet.
Recognizing Common Cleaning Errors
Scouring pads on any bowl, while tempting for baked-on messes, create micro-scratches that grow over time. Instead, use soaks and soft scrubbers for even the toughest residue; patience pays off long term.
Baking soda overuse can reduce gloss, especially on plastics. Limit its use to monthly maintenance cleans instead of daily scrubbing. Proactive cleaning eliminates the need for frequent deep cleans altogether.
Assuming bowl stains mean retirement wastes good tools. Most discolorations respond to basic natural solutions like vinegar and lemon juice if treated swiftly and properly.
Practical Analogies to Everyday Life
If you treat mixing bowls like favorite sneakers—wiping them down after each use and storing them away from harsh weather—they’ll carry you through many meals in comfort and style.
Like maintaining a reliable car, regular small check-ins prevent big, costly breakdowns. Set reminders on your phone—”bowls: quick scan and dry”—to make maintenance feel automatic.
Think of mixing bowls as gardening tools—they need the dirt rinsed off right away, occasional oiling if wood, and a safe dry spot to thrive. Match their care to your other prized tools for best results.
Smart Schedules and Routine Upkeep Solutions
Setting up a realistic, repeatable schedule for mixing bowl care minimizes last-minute stress. Consistency is key to making sure every bowl, no matter the material, is ready whenever inspiration for baking or cooking strikes.
Weekly wipe-downs replace stubborn scrubbing, turning bowl maintenance from a chore into a simple part of your standard kitchen rhythm. Aligning this habit with existing routines—like Sunday fridge cleanouts—makes it easy to remember.
Developing a Personal Cleaning Script
Cue yourself before meal prep: “Grab bowls, check for stains, wash and dry after.” This phrase streamlines both food safety and bowl care. Teach other household members this routine—kids and roommates benefit from having one unified approach.
If you cook frequently, set an alert for a deeper clean every other week. Designate this time for baking soda scrubs, surface inspections, and an extra round of air drying. Regularity beats intensity every time.
“When the bowls look cloudy or feel sticky, do a vinegar rinse today.” This cue becomes habitual and catches problems before they escalate, helping families effortlessly maintain mixing bowls as reliable kitchen allies.
Staying Resourceful: Simple Tools for Better Bowl Health
Every kitchen already holds the tools needed for outstanding bowl care—sponges, towels, a bottle of vinegar, and enough space for drying. Dedicate a small area for drying and inspection so cleaning tasks never pile up.
Avoid spending on fancy cleaners or organizers: consistent, diligent use of common items keeps mixing bowls in tip-top shape throughout the year, making your kitchen more efficient and food prep more enjoyable.
Final Reflections and Lasting Strategies
Reliable bowl care starts with regular cleaning, prompt repairs, and matching each bowl to the right use. Proactive attention keeps surfaces food-safe, durable, and always ready for fresh recipes.
When every member of the household understands these strategies, everyone benefits—fewer lost tools, less need for deep cleans, and more time spent truly enjoying kitchen projects together.
Small habits—like a quick rinse, a check for cracks, and giving bowls the right job—accumulate. Over years, these actions ensure mixing bowls become enduring companions, connecting meals across seasons and celebrations.
Frequently Asked Questions
How should I remove stubborn food stains from stainless steel mixing bowls?
Mix baking soda and water into a paste and apply it to the stain. Let it rest for 10–15 minutes, gently scrub with a soft sponge, then rinse thoroughly. Repeat as needed, and always dry the bowl completely to prevent water marks.
Is it safe to put wooden mixing bowls in the dishwasher?
Never wash wooden mixing bowls in a dishwasher. The heat and water exposure cause warping and potential splits. Instead, hand-wash quickly, use minimal soap, rinse well, and always dry with a towel right after washing.
What’s the best way to prevent mixing bowls from developing odors?
Let bowls air dry completely upside down. If odors persist, wipe with a cut lemon or sprinkle baking soda inside overnight. Rinse before using again. Prevent future odors by promptly cleaning and drying after each use.
Can glass mixing bowls handle hot foods or rapid temperature shifts?
Glass can break from sudden temperature changes. Always bring bowls to room temperature before pouring in hot ingredients. Avoid placing cold glass in hot water or vice versa. This simple habit prevents stress cracks and breakage.
Should I assign specific mixing bowls to certain recipes or foods?
Yes, assigning bowls to main tasks—such as keeping one for bread dough, another for salads—reduces stains, odors, and scratches. Label or group bowls by use if your kitchen is busy, and remind family or roommates to follow this rule for easier maintenance.