Walk into any bustling kitchen and you’ll see knives in action, slicing, dicing, and chopping at top speed. Amid that energy, learning to store knives safely saves time, prevents accidents, and reduces stress when things get hectic.
Kitchen knives aren’t just sharp—they’re essential, hard-working tools that require careful handling. Improper storage creates clutter, dulls blades, and puts everyone at risk. Finding the best way to store knives safely is vital for smooth kitchen routines.
This article shares practical ways to store knives safely, tailored to real-life kitchens where workflow, speed, and safety all matter. Read on for actionable methods, expert tips, and real scenarios you’ll want to use right away.
Establishing Knife Storage Zones for Instant Access
Designate specific storage zones and you’ll streamline prep, avoid misplacing blades, and lessen the risk of accidental cuts. One clear rule guides this: place each knife in its precise home straight after use.
A clear storage zone creates a routine. Even amidst a dinner rush, cooks stop, say, “Knife goes here,” and prevent jumbled drawers or loose knives on countertops— an essential first step in busy kitchens.
Setting Up a Wall-Mounted Magnetic Strip
Magnetic strips along the backsplash provide easy visibility and instant access. Place the strip above the main prep counter, away from moisture and direct heat, so knives can be grabbed—but never knocked—while cooking.
Always return each knife to the strip immediately after wiping the blade. A cook saying, “Magnet, then move on,” builds safe habits even in a rush. Children and casual staff won’t fumble or leave knives out.
Use a strong, commercial-grade magnetic strip for heavy chef’s knives. Weak magnets cause blades to slip, which can result in injury or damage. Double-check the magnet’s pull before storing important knives.
Outfitting a Dedicated Drawer Insert for Flat Storage
Drawer inserts keep knives separated so hands never contact sharp edges when reaching in quickly. Install a slotted wood or plastic tray with enough space for each blade, so even the largest knife doesn’t overlap another handle.
In a scenario where someone calls out, “Pass me the serrated bread knife,” the tool is found cleanly in its slot—no rummaging, no surprise cuts—making drawer storage safer and more efficient day-to-day.
Knife edge guards—snug plastic sleeves—add a barrier for drawer storage. Slide the guard on before placing a knife inside; this habit protects fingers and preserves a razor-sharp edge for longer use between sharpenings.
| Storage Method | Best For | Ease of Access | Takeaway |
|---|---|---|---|
| Magnetic Strip | Daily-used chef’s knives | Immediate, visible | Best for high-paced prep areas—install at eye level |
| Drawer Insert | All-purpose home sets | Moderate, organized | Ideal if you have kids or want hidden storage |
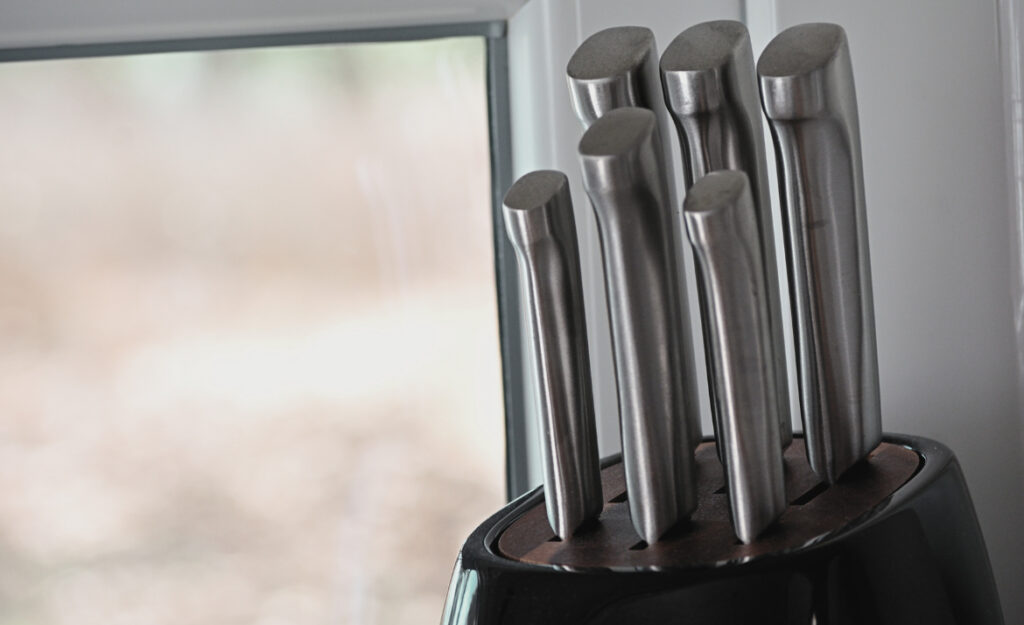
| Knife Block | Mixed knife types | Moderate, countertop | Portable; keep clean and dry for safety |
| Wall-mounted Sheath | Specialty blades | Immediate, visible | Perfect for one-off tools: label slots clearly |
| Edge Guards in Drawer | Backup or specialty knives | Slower, safest for storage | Use for seldom-used knives or travel |
Creating Systems That Keep Knife Safety a Constant Priority
Create daily routines that keep knife safety non-negotiable, even under pressure. Build habits, such as always cleaning, drying, and storing knives immediately after use, to reinforce safe practices across every shift.
Labeling storage areas helps teammates act without second guessing. Tape labels or color-coded icons so everyone quickly spots where each knife belongs, maintaining safety and efficiency for new or rotating staff members.
Routine Knife Safety Checks
Schedule visual knife checks at the end of every shift to confirm nothing is left out and all blades are dry and properly stored. Assign this as a checklist item to senior cooks or closing staff for accountability.
- Clean each blade before storage to prevent rust and food residue—a dirty knife becomes dangerous and damages storage trays.
- Inspect for chips or damage before putting knives away to avoid dull edges or cut risk the next time.
- Return knives to labeled slots or magnetic strips so everyone knows exactly where each blade sits.
- Double-check drawer closures to prevent blades poking out—ensure inserts are fitted properly for every size.
- Never leave knives soaking—rinse, dry, and store so the next person doesn’t reach into murky water or tangled utensils.
Explicit checklists cement these habits. During rush hours, assign quick “knife sweeps” every hour to keep tools where they belong and reaffirm safety standards for the entire team.
Customizing Safety Strategies for Different Workflows
Different kitchen roles require different storage strategies. For example, a prep cook might attach a portable sheath directly to the workstation, saying, “When on break, knives go here immediately.”
- Assign personal knife pockets for pastry chefs who move between stations—reducing drop risk.
- Specify counters for butchery knives with disinfected, vertical knife racks—separate from produce tools.
- Require line cooks to keep backup knives cased beneath the counter, so storage isn’t shared unsafely mid-service.
- Position slicer covers in clear view for quick edge checks—no excuses for leaving exposed blades after use.
- Document workflow-specific rules on a staff board, so teammates can reference the best “store knives safely” method for their task.
Whenever a task changes, have staff say aloud the rule for that station: “My knife returns here, every time after use.” This spoken habit strengthens team safety culture.
Placing Knife Storage Away from Hazards and High Traffic
Ensure every knife storage option sits away from the sink, open flames, and walkways. This prevents wet handles and accidental bumps from leading to dropped or mishandled knives during busy service hours.
Avoid storing any blade where children or untrained staff might reach. Install magnetic strips and racks above adults’ eye level or in locked drawers for absolute safety, especially during public-facing events or family gatherings.
Rethinking Countertop Knife Blocks
A countertop knife block must remain dry and at a distance from the stove or water. Rotate blocks regularly so moisture, crumbs, or mold never collect where knives rest, preserving edge performance and preventing germ growth.
If drops or spills occur, tip the block on its side and use a thin towel to clean slots. Move the block if you notice frequent splattering, as accumulated debris can compromise hygiene and damage both knives and block.
Set a kitchen rule: “If a block is wet, wipe and dry both knives and the block before any blade returns.” This prevents slippery handles and potential slip injuries when time is short during service.
Strategic Placement of Magnetic Racks and Inserts
Magnetic racks should not sit above cooking equipment or the sink, even if space is tight. Watch for condensation lines and splatter paths; store knives safely by mounting racks closer to prep zones, away from handheld appliances or dishwasher steam.
For drawer inserts, install non-slip mats beneath the tray. This anchors the entire knife tray, reducing movement even during hurried moments. Always teach newcomers: “Don’t stack items above the knife tray—blades should be free and clear.”
Use colored tape to outline where the tray resides within the drawer. This tape creates a simple visual memory cue—”the green space is where knives go back every time.” Every team member can see and follow the same rule, even on the busiest nights.
Choosing the Right Tools to Store Knives Safely in Every Kitchen
Selecting storage tools directly affects daily safety and kitchen workflow. Opt for systems that match your kitchen’s pace, available space, and the specific knives you own, instead of relying on a single traditional method.
Hybrid storage works well in kitchens with diverse staff and fast-changing demands. For example, combine a wall-mounted strip for chef’s knives, drawer inserts for paring knives, and edge guards for rarely used specialty blades.
Integrating Knife Edge Guards and Sheaths
Plastic or silicone edge guards add an extra layer of safety for knives kept in communal drawers or carried between workstations. Slide a guard over each blade before storing it anywhere out of sight, minimizing finger contact and chipping risk.
Encourage staff to say, “Edge guard first, then drawer” after cleaning a knife. This vocal reminder becomes muscle memory. Sheaths are best for knives traveling between stations or leaving the kitchen for events, as they fully encase the blade.
Reserve sheaths for knives that need portable protection, such as boning knives used at multiple prep sites. A team member saying, “Sheathed before I move” reinforces accountability and lessens accidents.
Knife Storage for Open Kitchens and Demonstrations
In open kitchens, knives should always appear orderly and secure to customers and staff. Install glass-fronted racks or labeled wall-mounted holders for specialty kitchen tools, so every blade has a visible, specific place to return after use.
Public-facing demonstrations may benefit from transparent storage containers with snap lids, discouraging unsupervised handling. Use signage such as “Return knives here after each use” at prep islands to remind guests or trainees of safety expectations.
For pop-up kitchens or mobile stations, compact knife rolls with labeled sleeves give each blade a home, preventing loose tools from causing clutter or injury during transport. Have event staff practice, “Knife in roll after demo—every time.”
Maintaining Knife Sharpness While Storing Safely
Proper storage not only protects hands but also secures sharpness and extends knife lifespan. The right storage prevents blades from rubbing, knocking, or dulling against each other or hard surfaces—even during a rush or cleanup sprint.
Maintain a routine where knives are wiped clean and dry and placed in their designated storage as soon as possible after use. This habit prevents food acids, water spots, and gritty residue from corroding edges or handles.
Minimizing Blade Contact and Friction
Storing knives separately in blocks, strips, or inserts reduces contact points. Never let blade edges touch—one blade leaning against another causes instant dullness or micro-chips that lead to dangerous slips.
Coated wooden or soft-plastic inserts dampen vibration and stop sharp edges from scraping surfaces. Encourage teams to say, “Blades separate, always,” when returning tools for cleaning or storage in a rush.
Upgrade to non-abrasive knife slots within blocks—felt-lined or food-safe silicone are best. These upgrades pay dividends in edge retention and cleaning ease for the entire kitchen.
Sharpening and Storage: The Working Loop
Integrate regular sharpening into your storage system. Every time you clean out the block or strip, test knives for sharpness: “If it drags, sharpen before storage.” Place a compact honing steel next to the storage for quick routine honing.
Knife blocks accumulate crumbs and dust—set reminders to tip blocks and clean slots weekly. Double-check for moisture or sticky residue after sharpening or washing, as any buildup degrades both sharpness and storage integrity.
Create a team challenge: spot-check each other’s knives for edge quality before storage, and celebrate when everyone is consistently keeping knives sharp, clean, and safely housed for busy services ahead.
Practical Systems for Home Kitchens and Shared Spaces
Adapt knife storage systems for home or shared environments by combining visibility, accountability, and ease of cleaning. Use modular storage solutions that change as new knives join your collection or as prep routines evolve over time.
A single household rule—“Store knives safely every time, no exceptions”—works across families, roommates, or communal living arrangements. Visual cues, like labeled slots or color tabs, simplify training new housemates or hosting visiting cooks.
Multi-Knife Storage: Blending Magnetic Racks and Drawer Inserts
A combination of a wall-mounted rack for larger chef’s knives and a drawer insert for paring or utility knives prevents double storage or overcrowding. Share a visible, accessible sign: “Knives on rack = washed and ready for use.”
Set a daily rotation: family members take turns wiping the magnetic strip and confirm all knives are accounted for at the end of each meal. This repeatable process eliminates both misplaced blades and confusion during busy cooking sessions.
Transitioning between kitchen users? Keep a log or dry erase board: everyone marks when knives are in use, cleaned, or stored. This system leaves no room for forgotten or lost knives, particularly when managing mixed culinary schedules.
Knife Storage for Safe Entertaining and Group Cooking
When hosting gatherings, always secure knives away from young hands, pets, or unclued guests. Move blocks and strips above adult eye level, or use lockable storage during parties to eliminate accidental cuts or dangerous access.
Assign a rotating “knife monitor” for group cooking events. This person checks before and after each prep phase—“Knives all present and cleaned before next course.” Visible accountability streamlines cleanup and lowers injury risk among novice helpers.
If prepping with guests unfamiliar with knife storage protocols, give a one-minute demo: “After slicing, knife in block here. No exceptions; store knives safely, please.” This simple walkthrough engages everyone in kitchen safety from the start.
Reinforcing Safe Knife Storage for Lasting Kitchen Confidence
Storing knives safely can be woven into every aspect of kitchen life. These strategies turn safe storage into a daily, nearly automatic practice, so both novice and experienced cooks move with confidence and peace of mind.
As you refine your knife storage systems, consider which solutions match your pace, staff, and space. Whether you use strips, blocks, or drawer inserts, the “store knives safely” principle remains the anchor for any efficient kitchen.
Pick one small improvement—from labeling to regular cleaning or edge guards—to start today. Each step not only protects knives, but also everyone who steps into your kitchen, ensuring smoother prep and safer meals for years to come.
Frequently Asked Questions
What’s the most common mistake people make when storing knives?
Leaving knives loose in drawers is the top mistake. It causes dulling, accidental cuts, and makes tools hard to find. Use organizers or strips to store knives safely and keep blades separated at all times.
Are magnetic strips safe for high-quality knives?
Yes, as long as the magnets are strong, and you always attach the side of the blade, not the edge. Weak magnets or improper mounting can cause slips, so invest in commercial-grade strips and train staff to store knives safely by side placement.
How can I keep knives safely stored in homes with kids?
Store knives safely by using wall-mounted strips set above adult height or locked drawers. Avoid countertop blocks if children can reach them. Teach kids from an early age that knives are only handled with supervision and clear routines in place.
Can I keep my knives in a block if I have limited counter space?
A knife block works in tight kitchens if it’s slim and placed away from the stove or sink. If space is still too tight, opt for drawer inserts with edge guards to store knives safely and maximize space while keeping sharp tools contained.
What is the best way to integrate knife storage with regular maintenance?
Pair your storage system with a routine: before storing any knife, wipe it clean and dry. Schedule weekly checks for block cleaning and blade sharpness. Link your “store knives safely” habit with “clean and check” before each knife returns to its home.


