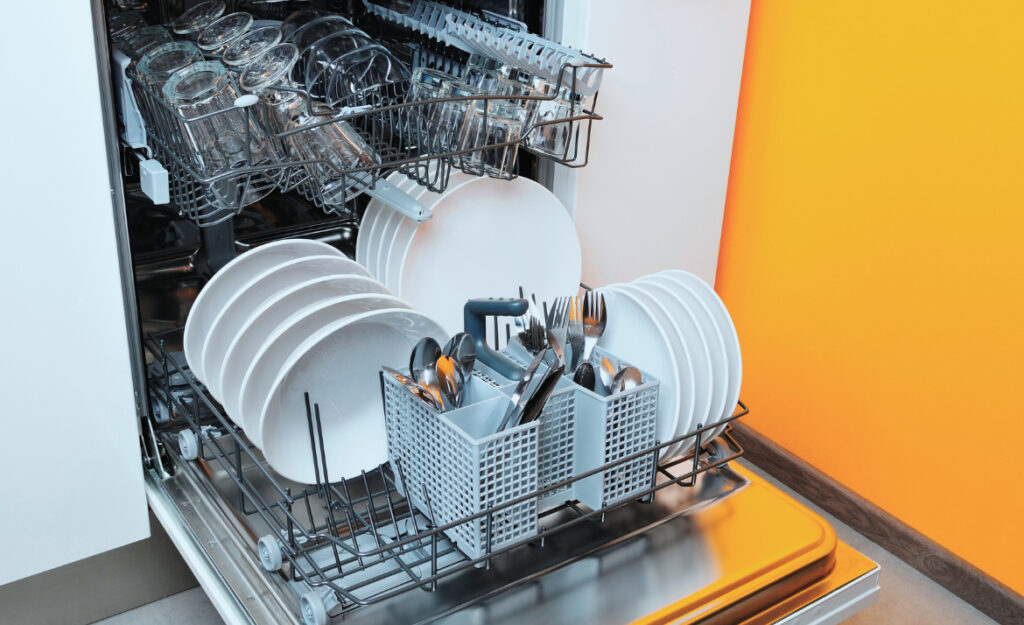
No one likes to see an industrial kitchen grind to a halt because of a dishwasher breakdown. Smart teams keep the conversation alive about efficiency and rely on key dishwasher repair tips to make sure service never slows.
Running a busy restaurant or cafeteria is challenging, and every piece of equipment matters. When dishwashers fail, downtime quickly affects staff, budgets, and the customer experience. Costs mount up in unexpected ways.
This guide delivers expert insights and hands-on dishwasher repair tips designed for industrial kitchens. You’ll learn exactly what to check, what to fix, and how to avoid unnecessary repairs—all with real-world examples and easy-to-follow steps.
Fixing Leaks: Clear Steps for Stopping Water Damage Fast
Stopping leaks quickly prevents water from invading kitchen floors, reducing hazards and costly shutdowns. Focusing on precise leak points lets you solve problems before damage spreads or insurance claims become necessary.
Stop, observe, and act. When you see drips under your industrial dishwasher, check connections, door gaskets, and hoses. Most leaks start with a loose clamp or a hardened rubber seal—both can be fixed in minutes.
Identify the Leak Source Without Guesswork
Wipe the outside of the dishwasher to remove old moisture. Shine a flashlight at seams, joints, and corners while running a cycle. If you see bubbling or fresh puddles, you’ve found your starting point.
Remove the kickplate and check the water inlet valve connection—a common culprit. Unlike home units, industrial dishwashers have larger, more accessible hardware that’s designed for quick service.
Gently tug on drain hoses and power cords. If anything feels damp or slides out of place, tighten or reseat the part. A secure fit drastically lowers the chance of future drips.
Replace Gaskets and Seals for Lasting Results
Find the dishwasher’s model number, then order compatible gaskets online. Soften the new rubber by soaking it in warm water for five minutes. Fit it snugly into the gasket groove—don’t stretch or twist.
Secure the door and test-bounce it: a properly fitted gasket provides gentle resistance. Wipe the edges dry after each service shift, preventing new residue from weakening the seal again.
If you notice a worn or misshapen door seal, swap it out before the next shift. Leaving it too long creates bigger leaks, short circuits, and extra costs you can avoid.
| Leak Source | What to Look For | Quick Fix | Takeaway |
|---|---|---|---|
| Door Gasket | Damp edges, visible cracks | Replace worn rubber | Stops repeated leaks at the door |
| Inlet Valve | Drips from hose junction | Tighten clamps | Reduces water waste |
| Drain Hose | Pooled water beneath unit | Reseat or replace hose | Prevents floor damage |
| Spray Arm | Erratic spray, leaks below | Unclog nozzles | Restores full coverage |
| Detergent Cup | Leaking detergent mix | Replace o-ring/gasket | Avoids chemical spills |
Resetting Malfunction Codes: Practical Recovery Steps for Quick Turnaround
Error codes delay dish service. Memorize your dishwasher’s main display alerts and keep a quick-reference card near the control panel. Many error codes resolve in seconds with targeted action—no full reset required.
Check the user manual for error codes like “E1,” “F6,” or “HE.” Certain errors ask for a power cycle; others require you to clear a drain filter or reconnect a temperature sensor for a restart.
Common Display Codes: Know Their Fixes
“F1” usually signals a water fill issue. Close the inlet tap, wait 10 seconds, then reopen it. Listen for refill—if silent, there’s a solenoid issue to address.
- Cycle the power quickly when error lights flash unexpectedly. Restarts clear temporary glitches without disrupting shift flow. It’s like rebooting a computer—fast and effective.
- Confirm door latches are tight. Control boards flag errors if latch sensors detect the door is ajar, even for a moment. Firmly close, then re-select your wash program.
- Open and inspect the drain filter. Remove debris and reseat the cap. Blockages trigger “dE” or “E2” codes—easy to clear with gloves and a rinse under the tap.
- Press the reset button (if present) or leave the dishwasher unplugged for one minute. Most dishwashers reboot their logic circuits automatically and return to standby mode.
- Keep a laminated cheat sheet of the top five error codes for your machine in the kitchen. Staff can resolve urgent faults without calling technical support every time.
Following these straightforward actions often reduces emergency repair calls and gets dishwashers back online before service grinds to a stop. Training staff on these dishwasher repair tips builds confidence and independence.
Minimize Downtime With Fast-Track Troubleshooting
Give staff permission to act on minor code resets. Supervisors can cover advanced repairs, but anyone should know how to unlatch, drain, and restart dishwashers safely.
- Keep a set of disposable gloves close by so employees feel comfortable removing filters and clearing debris. Hygiene and speed go hand in hand.
- Write down every error and the fix in a shared kitchen logbook. Future shifts reference past solutions, learning to resolve similar issues without hesitation.
- Store spare O-rings, a voltage tester, and hose clamps on a pegboard near the dishwasher. These small parts solve most emergencies in five minutes or less.
- Reinforce a calm response when an alarm sounds. A step-by-step reset means staff never panic or call in managers for every beeping alert during peak periods.
- Rotate troubleshooting roles at the start of each week. When everyone knows the basics, the team is ready for any repair, any time service is needed.
Bringing these actionable dishwasher repair tips into your kitchen culture will cut service delays and create a proactive, self-sufficient crew capable of restoring dish service fast.
Testing Heating Elements for Consistent Sanitation Results
Accurate temperature matters in industrial wash cycles. When dishes come out greasy or unsanitized, checking the heating element brings you closer to reliable, health-inspection-ready results with every load.
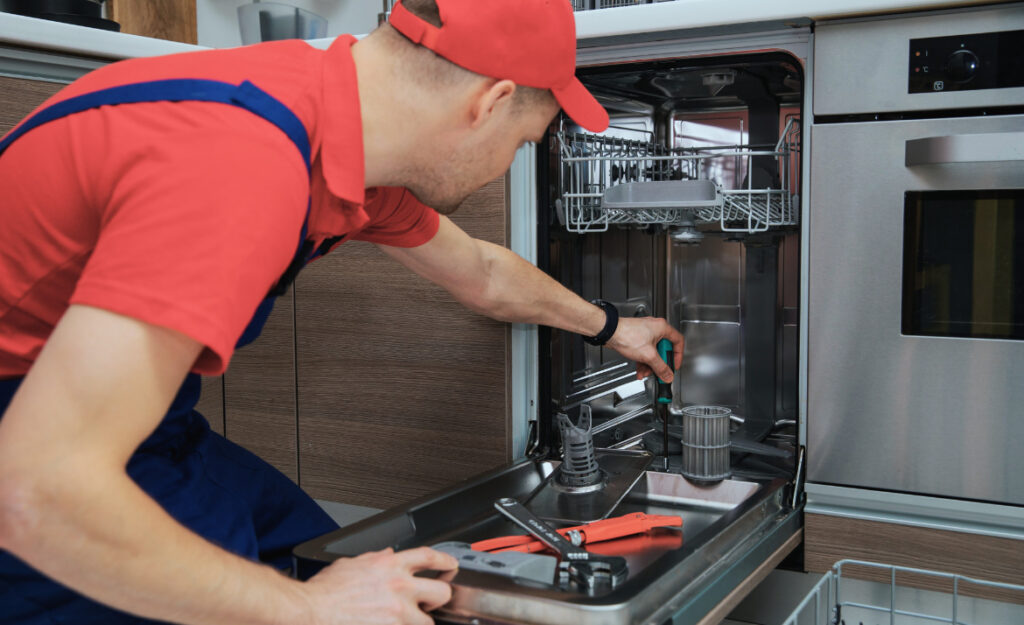
Access the panel, set your multimeter to resistance mode, and place the probes on each end of the element. If it reads open or infinite resistance, source a replacement part immediately.
Set Up a Fast Element Test
Turn off the power at the main breaker. Remove the dishwasher’s lower panel with a Phillips screwdriver and locate the thick metal heating coil beneath the wash tub. Check for visible breaks or scorching.
Clean contacts with a dry cloth before reconnecting. Consistent connections mean steady temperature control—essential for removing protein residue and passing weekly health checks in busy kitchens.
Instruct new staff on “the 30-second touch-test”: carefully hover a hand near (not on) the coil after a cycle. Warmth signals a working element; if cold, continue diagnosis.
Troubleshoot Relays and Sensors for Steady Wash Temperatures
A heating element alone can’t sanitize if thermal relays or sensors fail. Open the control panel and look for flashing LEDs on relay boards—an easy custom-designed alert in industrial kitchens.
Swap relays between units if you suspect a bad part. If the problem follows the relay, order a replacement. If not, check the temperature sensor’s resistance against the manufacturer’s standard chart.
Careful, step-by-step electrical checks prevent kitchen wide shutdowns and support precise dishwasher repair tips you can document and apply in every service shift.
Managing Clogs and Drainage Issues Before They Escalate
Proactively tackling drain slowdowns keeps dishwashers performing well. Begin with removable drain trays, screens, and hoses. Flush out blockages at shift’s end so standing water never collects underneath.
Staff spot warning signs quickly: noisy pumps, pooled water inside the tub, or the smell of old food. Addressing these indicators daily contains problems and extends major appliance lifespan.
Disassemble and Clean Drain Filters With Minimum Disruption
Lift up the machine’s bottom rack to reveal the circular filter assembly. Count to three, twist the cap, and lift debris straight up—staff can do this in under a minute at change of shift.
Scrub out residue using a dedicated brush designed for commercial kitchen filters. Build a routine that everyone follows, and dishwasher repair tips become second nature every evening.
Select eco-friendly de-scaling solutions to soak hard-to-reach drainage parts weekly. This prevents grease clogs and softens mineral build-up, simplifying future repairs and reducing labor costs on maintenance calls.
Install Transparent Drain Hoses as an Upgrade
Swap standard rubber hoses for clear PVC lines, so teams see clogs as they happen. An obvious blockage is easier to dislodge by hand or with a plumber’s snake.
Document every hose inspection on a kitchen maintenance chart. Encourage staff to sign off after each check; this builds accountability and a healthy cycle of continuous improvement.
Regular hose upgrades pay for themselves by minimizing mystery leaks and sudden service interruptions, closing the loop on your most practical dishwasher repair tips.
Establishing Regular Maintenance Schedules That Actually Work
Following a routine maintenance plan saves money and stops unplanned breakdowns mid-service. Print out a checklist, post it in the dish pit, and review it as a team before each shift starts.
Share key maintenance roles: cleaning filter screens, inspecting door seals, checking spray arms, wiping control panels, and testing temperature cycles. Assign specific names and times to guarantee tasks get done every day.
Weekly and Monthly Maintenance Schedules
Every Monday, clean out inside debris and run a self-clean cycle using a commercial cleaner. Each month, check and clean spray arm holes to maintain strong, consistent water patterns throughout the racks.
- Check racks for warping and broken prongs; fix or replace so ware never falls or jams.
- Test all buttons and control lights so staff catches faults early and logs each test run in a binder.
- Rotate descaling agents—calcium and scale require different substances over the months to get lasting results.
- Re-lubricate moving hinges and rollers quarterly so doors glide, never slam or stick.
- Wipe down exposed wires and connectors; dirt buildup leads to shorting and avoidable shutdowns.
Regular, simple steps prevent surprise costs and reduce time spent on complex fixes during the busiest meal periods in industrial kitchens.
Motivate Teams with Clear Rewards for Maintenance Consistency
Post monthly stats on the staff board: fewest breakdowns win small perks. Keep dishwasher repair tips front and center by recognizing those who spot issues first or finish preventative (not just emergency) jobs on time.
- Give team members visible recognition for every 10 maintenance checks done, with a leaderboard in the break room.
- Encourage friendly competition—shortest downtime after a fix lets everyone celebrate a job well done.
- Offer free coffees or small gift cards when someone completes a quarterly deep-clean, proving repairs were thorough and consistent.
- Host brief weekly huddles around the dishwasher to share quick wins, build camaraderie, and surface new repair ideas.
- Collect and display photos of “worst clogs” fixed in under five minutes to turn challenges into teachable moments.
This hands-on approach motivates the kitchen crew to develop expertise in dishwasher repair tips, keeping performance high and costs low throughout the year.
Building a Fast-Response Toolbox for Dishwasher Emergencies
Being prepared means less panic during crucial service windows. Stocking a basic, easy-to-find repair kit ensures that when problems arise, the team fixes the dishwasher right after spotting the first signs of trouble.
Common emergency tools include a flashlight, voltage tester, adjustable wrenches, gloves, cable ties, rubber gaskets, spray arm uncloggers, spare fuses, and a one-page kitchen-approved troubleshooting guide—laminated for durability.
Organize Tools for Grab-and-Go Action
Assign a spot under the sink or right by the dishwasher for the emergency kit. Use clear containers with bold labels for each tool, preventing any wasted minutes during rush periods.
Each team member gets a quick run-through of kit contents. If anything’s missing after use, they note it on the attached clipboard, keeping accountability high and waste down over months of use.
Place non-contact voltage testers and spare O-rings in small bins, stacked vertically for speed. A little systems thinking here shrinks downtime and helps your dishwasher repair tips stick long term.
Implement Checklists to Confirm Emergency Readiness
Use a pre-service checklist at the start of every peak period: inspect the kit, reset the dishwasher, and check water and drain lines for visible wear. Coaches oversee sign-offs, empowering staff and eliminating guesswork.
Review emergency responses in training meetings—roleplay a simulated leak at the most inconvenient time. Each person practices diagnosing and resolving issues in real time, sharpening skills for live scenarios.
Update checklists every quarter. Track which tools and parts get used most, and restock before running out. Organizations integrating these dishwasher repair tips run smoother, respond faster, and save money with every completed shift.
Leveraging Staff Training for Swift Self-Sufficiency
Effective staff training transforms hesitant teams into confident fixers. Short, interactive workshops let employees learn new dishwasher repair tips and put them into practice immediately after each session.
Assign crew leads responsible for onboarding new hires—they’ll model the right way to open filters, diagnose codes, and choose which repairs call for a professional versus quick in-house fixes.
Host Roleplay Sessions for Real-Life Scenarios
Stage a “dishwasher fails mid-service” situation and roleplay scripted steps together: who calls the shift lead, who shuts off water, who grabs the emergency kit, and who logs the incident for follow-up.
Let staff practice running through simple dishwasher repair tips while a coach observes and corrects technique. Record time taken from start to fix for steady improvements between sessions.
Rotate responsibilities with every training to prevent knowledge gaps. Shared skills mean any crew member handles breakdowns independently, reducing the risk that a single absence grinds workflow to a halt.
Document Knowledge in a Visual Repair Guide
Photograph common repairs like unclogging spray arms, fitting new gaskets, or cycling error codes. Add step-by-step notes and laminate the sheets as a “grab-and-go” binder for the kitchen wall.
Incorporate QR codes for video tutorials. Staff scan using phones to review dishwasher repair tips before starting a tricky fix, even mid-rush hour. Pair videos with bulleted checklists for each scenario.
Empowering staff with visual how-tos accelerates learning and ensures new hires adapt to emergency repairs quickly, supporting a maintenance-driven kitchen culture every day.
Reviewing Key Strategies for Long-Term Dishwasher Longevity
The combination of proactive checks, fluid teamwork, and a visible repair culture forms the backbone of cost-effective kitchen operations. Real results come from training, routine, and acting swiftly on even minor dishwasher repair tips when needed.
Recognizing early warning signs—like leaks, blocked drains, and error codes—stops emergencies from turning into major headaches. Quick, confident troubleshooting by well-trained staff turns challenges into opportunities for cost savings and smooth service.
Industrial kitchens thrive when teams grow their expertise together. By using these specific dishwasher repair tips, kitchen managers future-proof their dishwashing process, build staff pride, and create kitchens ready for anything the shift brings next.
Frequently Asked Questions
What should I do about a dishwasher that won’t start during a rush?
If the unit won’t respond, check the power connection, reset the circuit breaker, and verify that the door latch closes fully. If lights remain off, call an electrician or maintenance specialist promptly.
Can I use household plumbing supplies for quick dishwasher repairs?
In an industrial kitchen, only food-safe, commercial-grade parts should be used in repairs. Substitute parts may fail under heavy use and jeopardize health department compliance, so always source as specified in your equipment manual.
Why does our industrial dishwasher leave residue on dishes?
This usually signals clogged spray arms, a malfunctioning heating element, or using incompatible detergents. Following dishwasher repair tips—such as regular filter cleaning and using approved detergents—restores shine and ensures safe, sanitary dishware every cycle.
Who should be responsible for daily dishwasher repair checks?
Share responsibility among rotating kitchen staff. Everyone should know how to act immediately on leaks, error codes, and visible obstructions to reduce expensive service calls and prevent avoidable downtime mid-shift.
How often should maintenance schedules be updated for busy kitchens?
Review and adapt checklists quarterly, adjusting for heavy traffic periods, equipment aging, or newly installed machines. Ongoing training and checklist reviews keep dishwasher repair tips relevant and effectiveness high throughout the team.