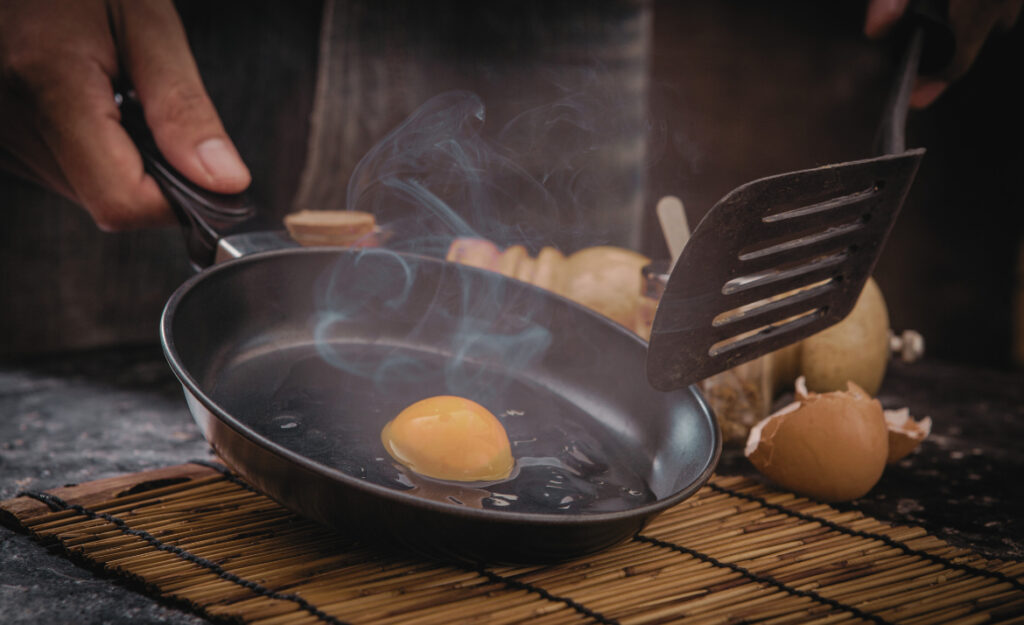
Stainless steel utensils pick up all the action in a kitchen, easily showing smudges, spots, or streaks. When you go to clean stainless steel utensils, you want that bright, polished look—without scratches.
These utensils are everywhere for good reason: they’re durable, corrosion-resistant, and make any prep area look tidy. Scratches disrupt that shine and make cleaning trickier each time you repeat it, so careful handling is a must.
Explore practical tips, tailored routines, and specific tricks. This article details the best ways to clean stainless steel utensils without scratching, so they always look and feel like new in your hands.
Setting Up for Scratch-Free Cleaning Success
Prepping your cleaning area and tools keeps stainless steel utensils free from unwanted marks. Start by clearing your sink and choosing dedicated cloths to avoid grills, sponges, or rough pads that cause scratches.
Even simple habits like rinsing right after use help when you clean stainless steel utensils. Grime and stains have less chance to dry, so you’ll need less elbow grease later on.
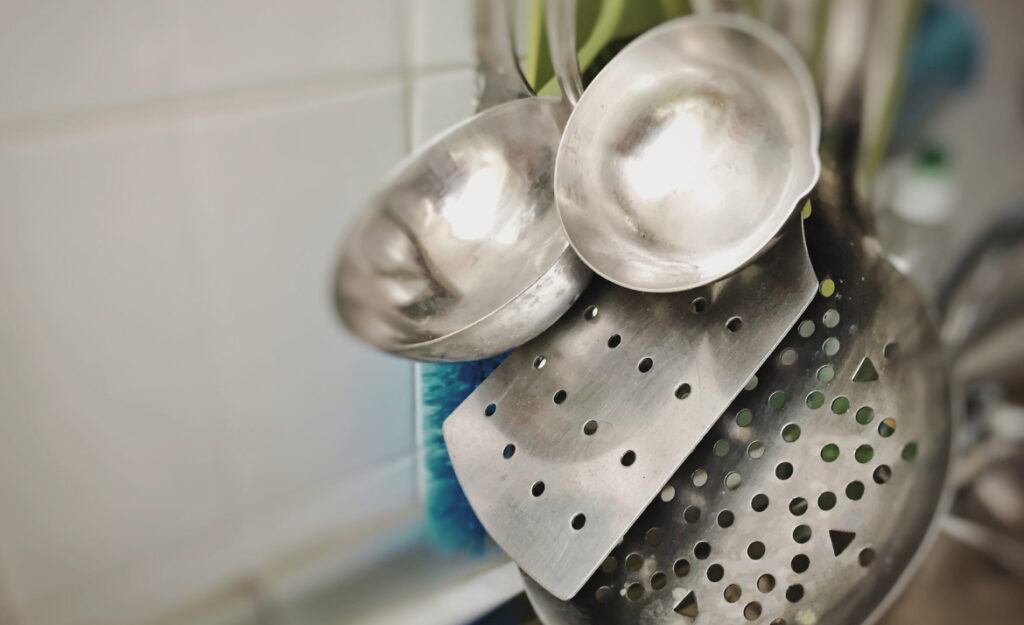
Choosing the Right Cleaning Tools
A microfiber cloth glides smoothly across metal surfaces, bringing out a glint without wearing away protective layers. Many cooks stash one next to the dish soap for this very reason.
Soft-bristle brushes allow you to clean stainless steel utensils thoroughly, especially around crevices or decorative edging, without causing dulling over time.
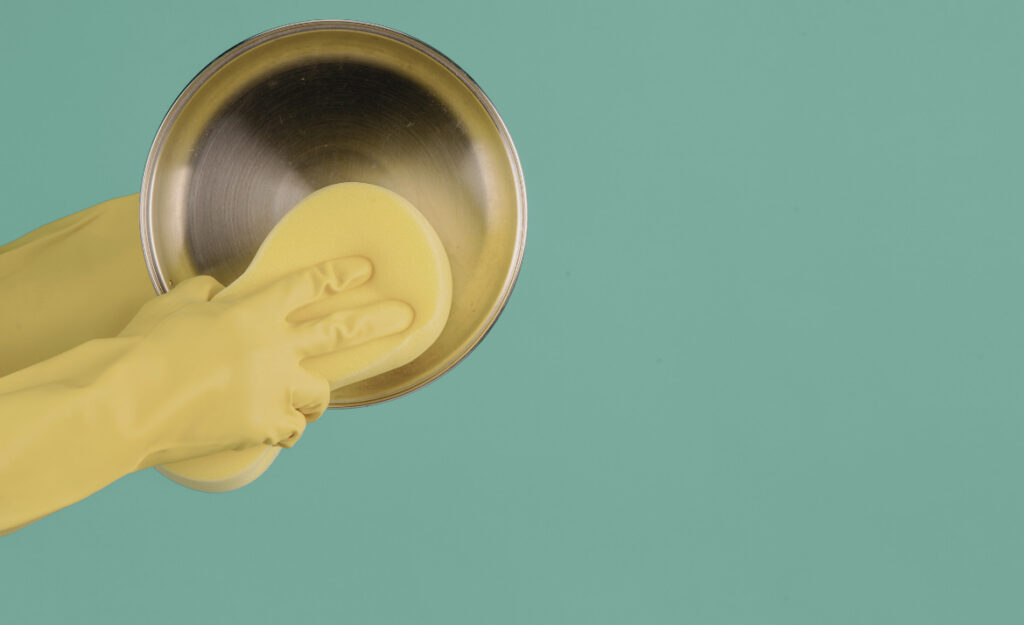
Avoid abrasive sponges and pads. Even if a utensil looks tough, a single scouring pass can leave visible lines that attract further residue, changing the metal’s sheen.
Staging Your Sink Area
Before washing, empty your sink of dish racks and stow away anything sharp or heavy. This ensures nothing clangs against your utensils while you work.
Fill one side with warm, soapy water and leave the other clear for rinsing. That way, when you clean stainless steel utensils, the soap doesn’t dry and leave annoying residue behind.
Set aside a drying mat or clean towel so utensils don’t rub against each other in a pile. Air drying with space between each piece helps avoid accidental scratches and water marks.
| Tool / Method | Risk of Scratching | Recommended For | Action Step |
|---|---|---|---|
| Microfiber Cloth | Very Low | All Stainless Utensils | Wipe along the grain after cleaning |
| Soft-Bristle Brush | Low | Utensils with Crevices | Brush gently to loosen grime |
| Regular Sponge | Moderate | Light Scurf | Sponge softly; avoid scrubbing hard |
| Steel Wool Pad | High | Never For Stainless | Avoid entirely for cleaning |
| Dedicated Dish Towel | Very Low | Hand-Drying All Utensils | Pat and polish dry |
Boosting Cleanliness While Avoiding Common Mistakes
Keeping stainless steel utensils clean also means avoiding errors that leave you with scratches or water spots. Use the following steps to consistently clean stainless steel utensils without issue.
Collect the utensils and separate from cast iron, copper, or aluminum. This prevents chemical reactions during cleaning that could mar your tools.
Understanding the Importance of Direction
Wipe and scrub utensils only in the same direction as the grain. The faint lines in the metal indicate the safest motion that avoids visible swirls and scratches.
- Wipe with the grain every time you clean stainless steel utensils; this reduces friction, making your routine both scratch-proof and effective.
- Pat utensils dry instead of rubbing; gentle pressure with a soft towel preserves shine.
- Rinse utensils quickly after using acidic foods like tomato or citrus; lingering acid dulls polish and can etch fine marks.
- Check for stuck-on bits before scrubbing harder; soak stubborn areas, never pick at them with sharp silverware.
- Use a fresh, clean cloth for each cleaning pass to stop grit from previous uses from damaging utensils.
Committing to these small habits every time will make your stainless collection shine without worry. Consistency is the key here.
Separating Stainless from Reactive Metals
Mixing metals in the sink during cleaning can stain or pit utensils. Reserve one side of the sink and a dedicated cloth strictly for cleaning stainless steel utensils.
- Wash stainless before copper or aluminum to minimize risk of discoloration and maintain a mirror-like finish over time.
- Keep cleaning station tools separate: one brush for stainless, another for cast iron or nonstick surfaces.
- Stack only similar materials when drying. Don’t pile stainless with heavy pans or knives.
- Dry stainless utensils immediately—never let water pool—this avoids spots and chemical reactions from mixed residue.
- Check your soap label for compatibility with stainless steel. Some dish soaps contain salts or acids that can harm finishes if left on too long.
With these methods, your stainless utensils will keep their shine and strength for years, saving you time and replacements in your kitchen routine.
Building a Gentle Daily Cleaning Habit for Lasting Shine
Pretreating utensils and using the right order helps ensure scratch-free results every time you clean stainless steel utensils after meals.
Consistency leads to reliable results over months and years. Slot these routines into your daily kitchen flow and feel the difference in every polish.
Pretreating Stubborn Food Residue
Soak tough, baked-on bits for 10 minutes in warm, soapy water after cooking. You’ll find cleanup much easier as food slides off with only mild agitation.
Use a soft brush to dislodge any stuck food without pressing hard. For burnt areas, rely on a paste of baking soda and water—never aggressive scrubbing pads.
Always rinse thoroughly after using any cleaning powder, as residue can build up and dull the stainless finish over repeated washes.
Sequencing Your Cleaning Steps
First, scrape off loose food using a non-abrasive spatula. Next, gently wash each piece in soapy water, one at a time, to reduce accidental knocks.
Rinse under clean, running water. Place utensils directly on a dish rack or fresh towel, spacing them out to avoid direct contact that might cause scratches as they dry.
Finish by polishing utensils with a clean microfiber cloth every few days. This prevents streaks and restores the signature shine that makes stainless steel inviting to use.
Elevating Stainless Steel Care With Home Remedies and Refinements
Add a handful of simple ingredients and tweaks to make your utensils sparkle, even after heavy use. These methods complement your regular cleaning routine.
Try natural polishers when you clean stainless steel utensils for a gentle, chemical-free solution.
Refreshing With Vinegar and Baking Soda
Mix a solution of equal parts water and white vinegar in a spray bottle. Lightly mist utensils, wipe with a microfiber cloth, and enjoy a streak-free finish.
Baking soda acts as a gentle abrasive—make a thin paste with water, then rub gently along the grain line. Rinse away completely so no powder remains.
For darker spots or discoloration, repeat with vinegar after using baking soda. The acidity lifts residues without causing harm to the smooth, reflective surface of your utensils.
Polishing for Brilliance and Longevity
Apply a small dab of mineral oil or olive oil after cleaning and drying. Rub lightly with a soft cloth, then buff to remove excess for a subtle shine barrier against water spots.
Every few weeks, check for and remove fingerprints using a tiny bit of glass cleaner on a cloth. Move only along the grain so you don’t leave swirls.
A double-buff process makes utensils gleam. Let each polish layer settle for a minute, then finish with a second, clean microfiber for streak-free luster.
Perfecting the Art of Scratch Prevention With Everyday Tools
Knowing what to avoid is as important as perfect technique. Make these strategies a natural part of the way you clean stainless steel utensils and achieve lasting results.
Many cooks swap between multiple tools in a busy kitchen, but dedicated cleaning gear for each purpose is essential.
Understanding the Long-Term Impact of Tool Choices
Switching to soft-dedicated brushes or non-abrasive scrubbers drastically increases lifespan for stainless tools. The extra minute to grab the right cloth truly pays off.
If a utensil looks cloudy after cleaning, add a vinegar rinse or check your dish soap for leftover food oils that need a gentler second wash.
Replace cleaning cloths every month, or when fibers wear thin and lose softness. Worn textiles pick up tiny particles that can scratch even invisible layers of stainless steel.
Building Scratch-Safe Drying Routines
Never throw clean utensils into a dish heap. Air dry each piece propped up or flat, not stacked. This avoids rubbing and the formation of fine, parallel scratches.
Upgrade to a silicone drying mat with raised ridges, which creates airflow under the utensils and shortens drying time while protecting surfaces.
Assign a shelf or basket to clean stainless steel utensils alone. This makes them easy to find for quick meals and keeps every finish flawless longer.
Unlocking the Full Potential of Stainless Steel for Kitchen Efficiency
Your utensils last longer and look better when you clean stainless steel utensils with consistent care and the right materials each time.
Preserving shine means more than appearances. It makes even old utensils easier to sanitize, resisting stains and buildup with every wash.
Minimizing Water Spots and Residue
Dry utensils immediately after rinsing. Water droplets can leave dull marks as they evaporate, so this tiny change delivers big improvements in shimmer and sanitation.
If water is hard in your area, use distilled or filtered water for your final rinse. This prevents mineral buildup that dulls reflective finishes over time.
Check the drying area for crumbs or food residue from previous use, as these can transfer to utensils and cause blotchy, stubborn marks.
Preserving Grip and Comfort Over Time
When you clean stainless steel utensils, always check that soft, rubberized, or silicone handles remain intact and free of grit. Wipe handles dry along with blades or scoops every time.
If handles loosen after many cleaning cycles, tighten fasteners or replace the grip pads to maintain safety and comfort in a busy kitchen.
Rotate utensil use—give each one a day off for deeper cleaning so nothing wears unevenly or collects residue in hidden joints.
Consistent Care Guarantees Long-Lasting Shine
Each time you clean stainless steel utensils, think of it as restoring a prized tool—functionality and finish go hand in hand. The right habits ensure these pieces look and perform beautifully year-round.
Even older utensils regain luster with a routine of proper cleaning, drying, and polishing. Invest now in prevention—scratches rarely reverse, but shine can be preserved with little daily effort.
Try the methods above and enjoy a kitchen set that feels freshly polished every day, ready for everything from family meals to holiday feasts and casual snacks in between.
Frequently Asked Questions
Can I put stainless steel utensils in the dishwasher?
Dishwashers are safe for stainless, but hand washing prevents dullness and keeps finishes brighter longer. Place utensils spaced apart and avoid mixing with reactive metals when using a dishwasher.
What should I do if my utensils have stains that won’t budge?
Make a baking soda paste and rub with a soft cloth, following the grain. Rinse thoroughly. For extra help, use vinegar or a dedicated stainless cleaner before drying and buffing.
How often should I polish stainless steel utensils?
Polish with mineral oil or olive oil after every 5–10 washes, especially for frequently handled utensils. Routine buffing prevents spots and restores shine.
Is it safe to clean stainless steel utensils with lemon juice?
Yes, but rinse thoroughly to avoid acidic residue, which can cause dulling over time. Lemon’s mild acid lifts spots, but lingering juice can damage the surface with repeated use.
Can scratched utensils be fixed?
Light scratches can be buffed using a dedicated stainless steel polish and a microfiber cloth, always rubbing in the same direction as the grain. Deep scratches usually require professional refinishing.